Add a third-party device (customer managed device)
You can add and assign third-party devices (also known as customer-managed devices) to users or workspaces. These devices can include third-party SIP devices like door phones, overhead pagers and ATAs, and digital fax solutions.
Feature prerequisites
The following specifications apply when adding third-party SIP devices:
- Devices must be manually provisioned, and you must own the SIP Authentication credential. You are responsible for any fraud created due to failure to secure these credentials.
- All third-party devices connecting to Webex Calling must support TLS 1.2.
- There are minimum firmware requirements in place. Check the third-party documentation for details.
- Customer managed devices offer two generic SIP profiles — Generic SIP Phone and Generic SIP Gateway. These profiles allow SIP-TLS 1.2 compliant devices to connect to Webex Calling, without adding the specified device name in the Control Hub. Similar to the other customer managed devices, Cisco technical support doesn’t investigate issues with devices connecting through this provisioning option.
Add a third-party device to a user
- From Control Hub, go to Management and select Devices.
You can also add a device to the user from the users section in Control Hub by navigating to Management > Users > select a user > Devices > Add device.
- Select Add device.
- Choose Personal usage to assign a device to a user and then click Next.
- Enter either the username or the actual name of the phone's owner, choose the user from the results, and then click Next.
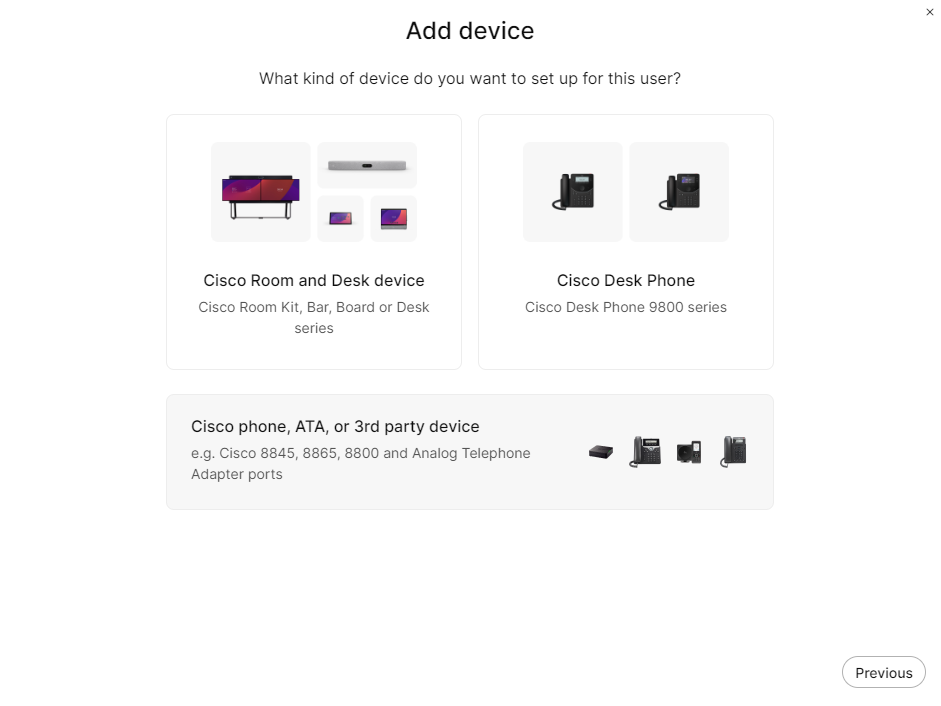
- Choose Cisco phone, ATA, or 3rd party device.
- Choose Customer Managed Devices from the Select device drop-down menu.
- Choose a device vendor from the Device Vendor drop-down menu, and enter the MAC address. The line ID information can be found under Device Management.
The SIP username or password and Outbound proxy values are the same as the data in the details section.
If you've selected a fax service, then the MAC address field is automatically populated with a fake MAC address and it’s read-only.
- Read the disclaimer and click the confirmation box. Then, click Save. Provision the device to use DNS SRV, which resolves the domain provisioned for Outbound Proxy.
- The confirmation screen shows important information that you need to finish the provisioning process of your Customer-Managed Device.
Tip: Note your SIP Username and Password as you need this information to finish setting up your customer-managed device. You can also download this information in a CSV file for your records. This is the last time that you can see the password in full.

Add a third-party device to a new workspace
- From Control Hub, go to Management and select Devices.
You can also add a device to the user from the workspaces section in Control Hub by navigating to Management > Workspaces > Add workspace.
- Select Add device.
- Choose Shared usage and then select New workspace.
- Enter a name for the workspace (such as the name of the physical room), select the room type and add capacity, and then click Next.
- Choose Cisco phone, ATA, or 3rd party device.
- Choose Customer Managed Devices from the Select device drop-down menu.
- Choose a device vendor from the Device Vendor drop-down menu, and enter the MAC address.
If you've selected a fax service, then the MAC address field is automatically populated with a fake MAC address and it’s read-only.
- Read the disclaimer and click the confirmation box. Then, click Next. Provision the device to use DNS SRV, which resolves the domain provisioned for Outbound Proxy.
- Click the Calling service, and choose the subscription and license type that you want to assign to the workspace.
- Professional workspace
- Common area workspace
- Assign a Location and Phone Number (determined by the location that you choose), and then click Save. You also have the option of assigning an extension.
- The confirmation screen shows important information that you need to finish the provisioning process of your Customer-Managed Device.
Tip: Note your SIP Username and Password as you need this information to finish setting up your customer-managed device. You can also download this information in a CSV file for your records. This is the last time that you can see the password in full.

