Add multi-line support with virtual lines
You can set up multiple lines for users using virtual lines. Without requiring an additional license, you can set up virtual lines and the associated business calling features like voicemail, call forwarding, call waiting, and more. After being configured, non-primary lines can be assigned to the device and Webex App. Like the primary line, these lines are used to make and receive calls.
This guide provides an overview for how to create, assign, and configure multi-line support using virtual lines.
Common use cases of virtual lines are:
- Users in support roles who manage a high-volume of incoming calls across multiple queues and hunt groups.
- Regional workers who desire phone numbers in multiple local area codes.
- Administrative staff who manage calls for executives on shared lines.
- An executive who needs separate private and public lines.
Prerequisites and limitations
The prerequisites to configure a virtual line are:
- You must be either a full administrator or a user and device administrator.
- Virtual lines can be assigned only to users with Webex Calling professional licenses.
The following are known limitations of the virtual line:
- Virtual lines can't be assigned to a workspace device.
- Virtual lines can't be assigned to an executive to be used for executive-assistant functions.
- Virtual lines can't be associated with a workspace device as a hoteling guest.
- Virtual lines can't be configured to monitor other numbers or call park extensions.
- Calls to virtual line numbers can't be recorded.
- A user can't manage call settings of virtual lines in the user portal.
- Call center soft keys show only if the virtual line is part of a call queue.
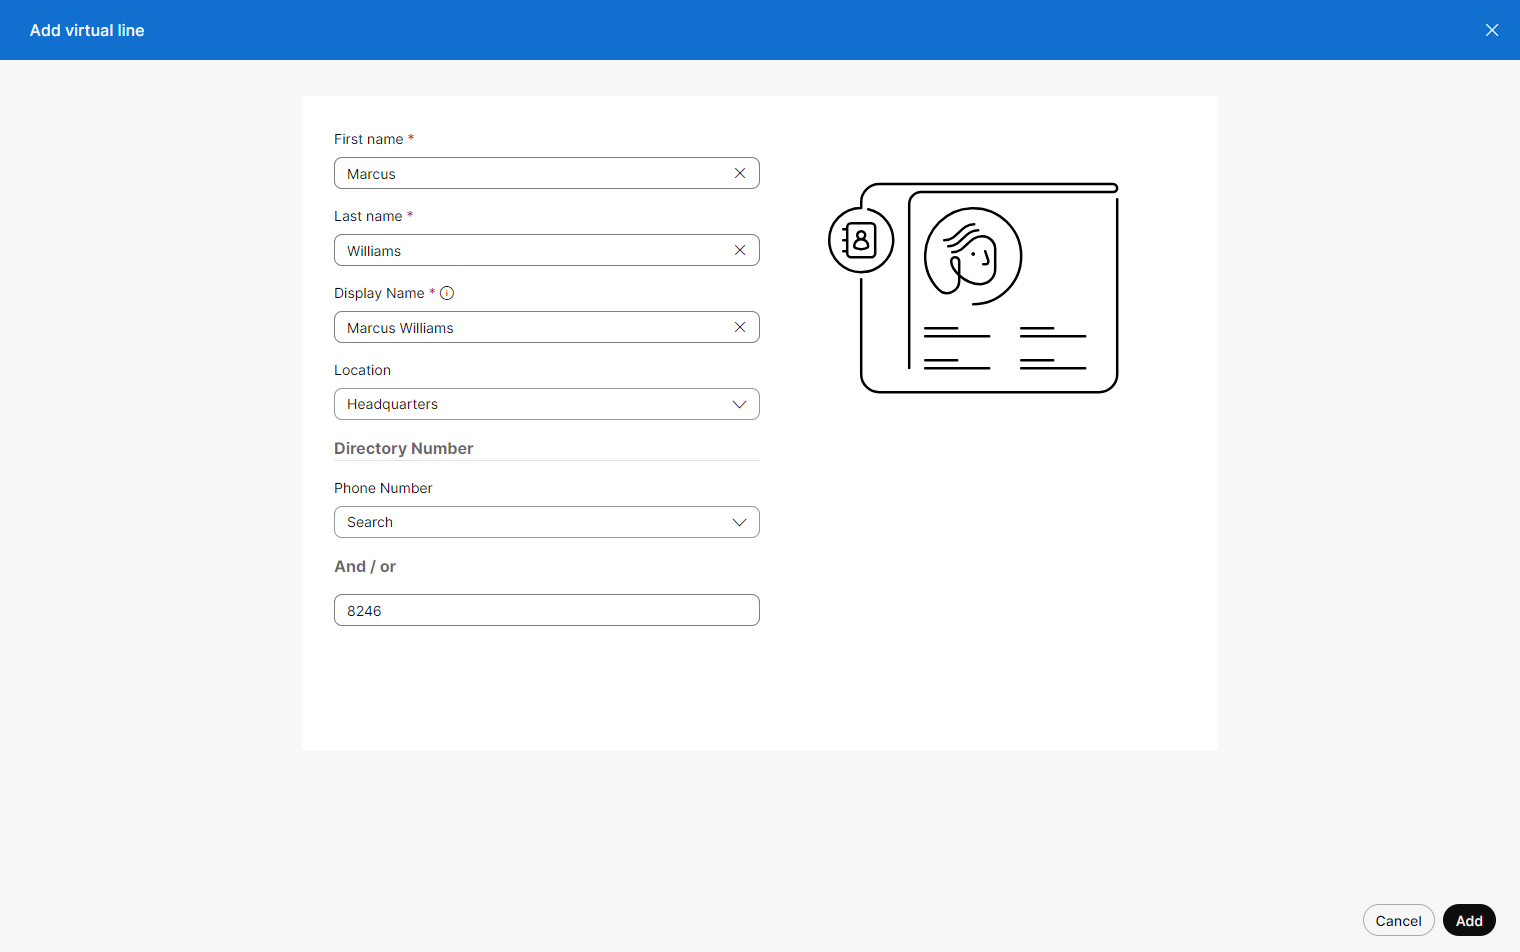
Create a virtual line
- From Control Hub, go to Services and select Calling.
- Select Virtual Lines.
- Select Manage and then Add new.
- Enter the following details:
- First name and Last name - Used as the line name.
- Display name - Populated based on the entered first name and last name. You can also change the display name. The display name appears in the contact directory (if Directory Search toggle is enabled) and the caller-ID.
- Location - Choose the location for the line.
- Phone number - Appears only after choosing the location. Choose the Direct Inward Dial (DID) number from the location where the line is created.
- Extension - Allows you to add the extension to the line.
- Click Add.
The virtual line is created with default call settings under the Virtual Lines tab. You can modify the call settings of the line and continue adding the lines by repeating these steps. You can edit, delete, and view the created lines from the same page.
Create virtual lines in bulk
- From Control Hub, go to Services and select Calling.
- Select Virtual Lines.
- Select Manage and then Upload CSV.
- Perform one of the following:
- To add the new virtual lines in a blank CSV template, click Download .csv template.
- To edit the existing data and to add new lines, choose Virtual Lines from the drop-down list and click Download Data.
- In the spreadsheet, fill first name, last name, display name, location, phone number, and/or extension. In the Outgoing column, add TRUE to enable the outgoing calls and FALSE to disable them.
- Upload the CSV file by dragging, dropping, or clicking Choose a file.
- Click Upload. You can click view import history/tasks to view the import and export status.
The virtual line is created with default call settings. You can modify the call settings of the line any time.
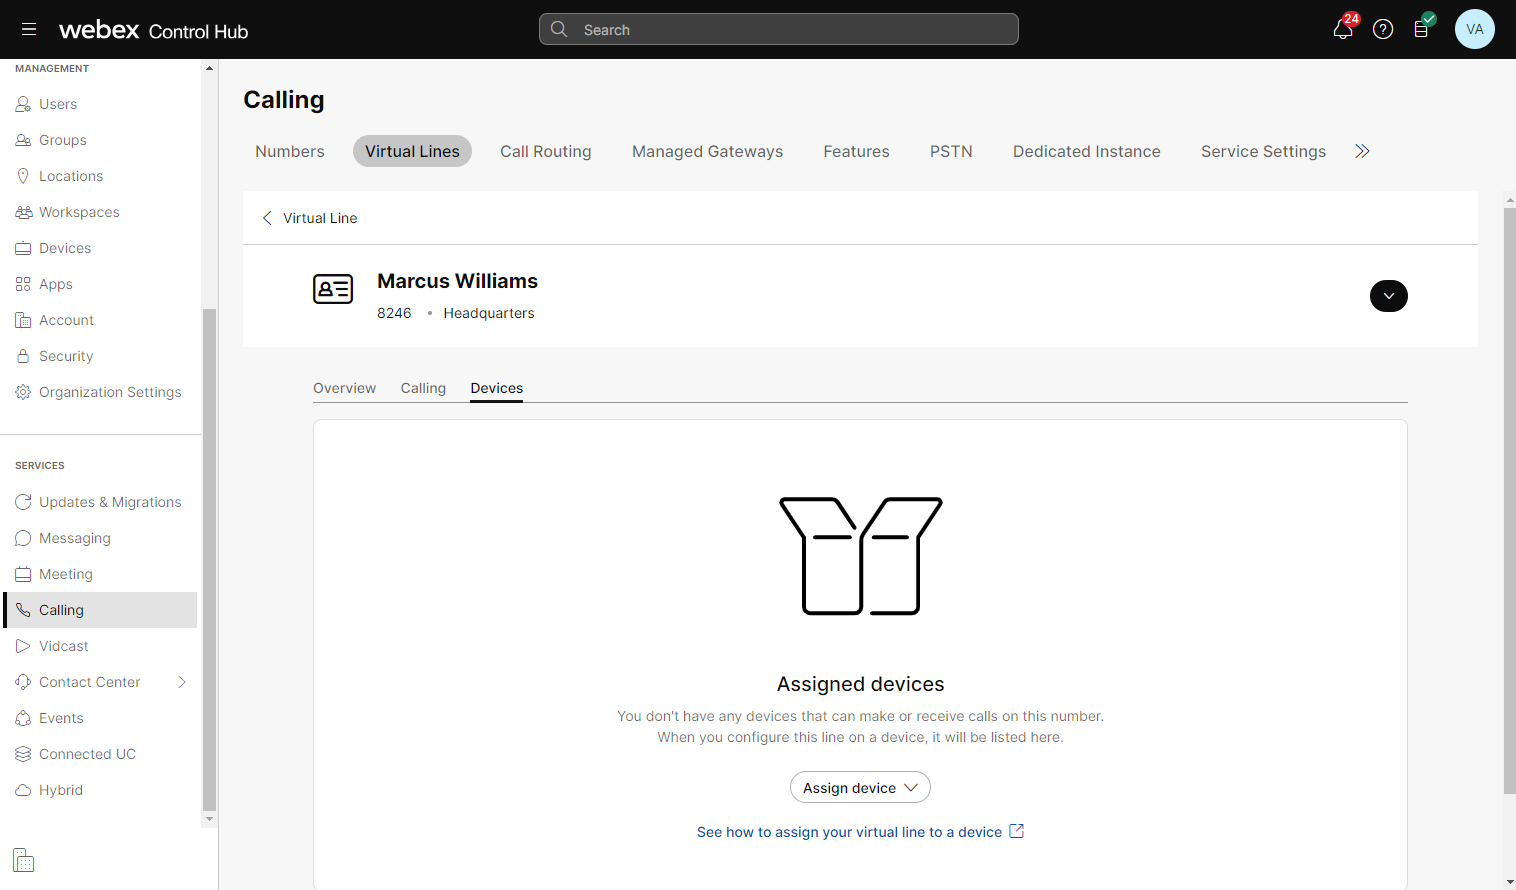
Assign a virtual line to a device
- From Control Hub, go to Services and select Calling.
- Select Virtual Lines.
- Select the virtual line that you want to assign to a device.
- Select the Devices tab and then click Assign device.
- Select a device for the Select device drop-down menu.
- Click Assign. The next page displays the list of configured lines that are already assigned and the newly added virtual line for the specific device. You can also change the order of lines by dragging and dropping, as needed.
- Click Save.
The Devices tab now shows the details such as assigned to, location, device name, and device status.
Users can now access the virtual line from the footer of the Webex App or from separate line keys on the phone.
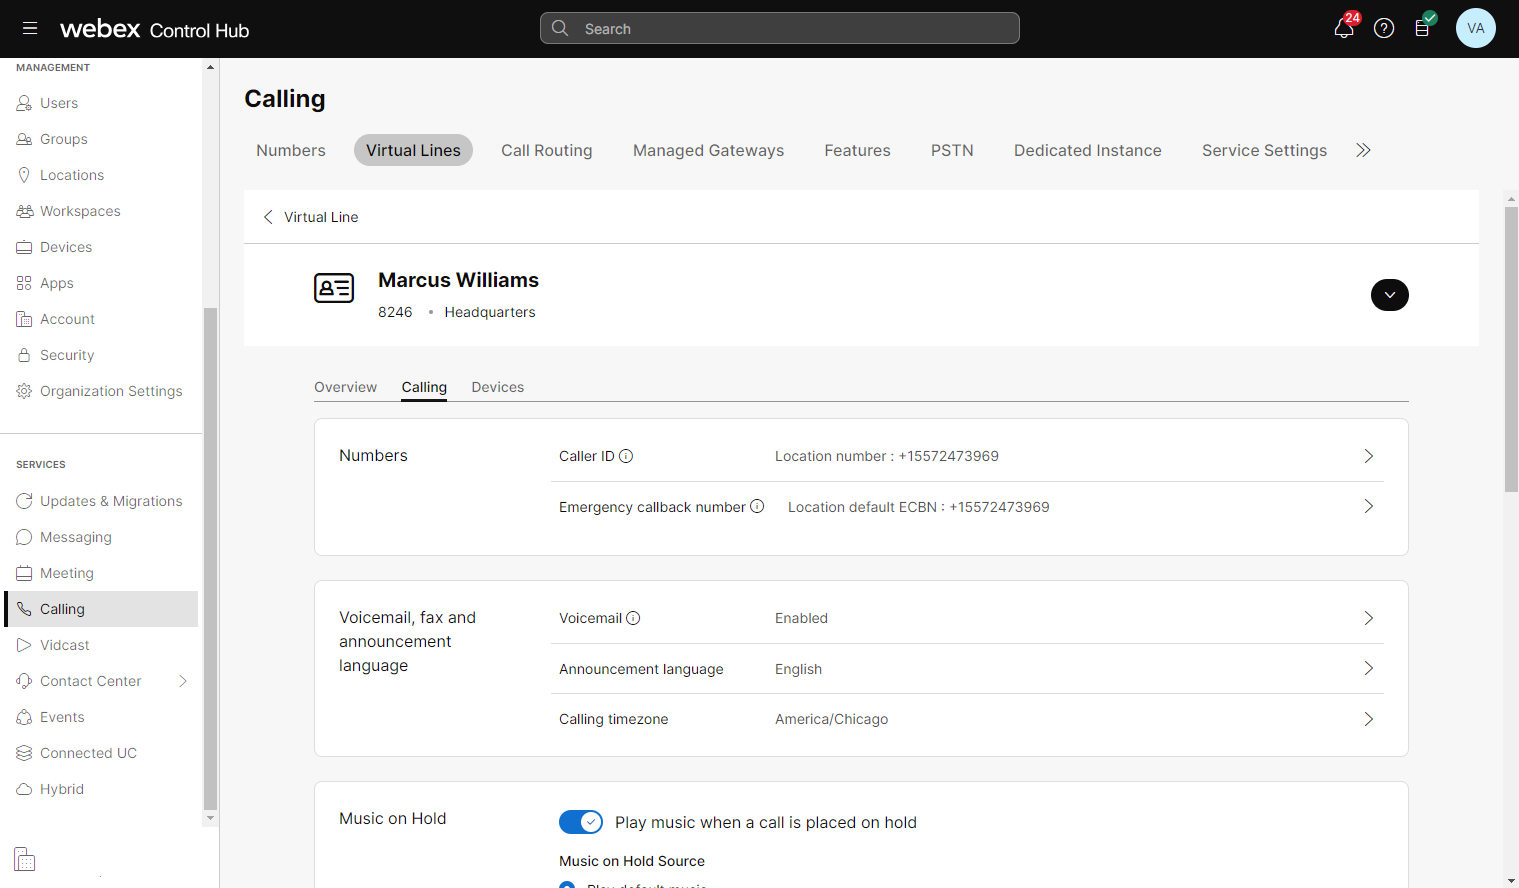
Configure call settings for a virtual line
- From Control Hub, go to Services and select Calling.
- Select Virtual Lines.
- Select the virtual line that you want to assign to a device.
- Select the Calling tab.
From here, you can configure the settings for the line in the same way as you configure the settings for a user.