Create and manage schedules for a location
Time schedules are used to support other features like auto attendants and call queues. A time schedule establishes a set of time slots in which a feature can execute specific behaviors. They are used to route incoming calls based on the day of the week and/or time of day. Schedules are classified as either Business Hours or Holiday.
Feature notes
- Schedule names and event names need to be unique.
- If you expect to treat all incoming calls in the same manner, regardless of day or time, configuring a time schedule is unnecessary.
- During a Holiday Schedule, callers are routed based on the After Hours settings.
- Typically, upon install of your service, two predefined schedules are set up and assigned to an auto attendant:
- Auto Attendant – Business: This schedule defines the days and hours your office is taking phone calls.
- Auto Attendant – Holiday: This schedule defines the days your office is closed due to a holiday and not taking phone calls.
Create a new schedule
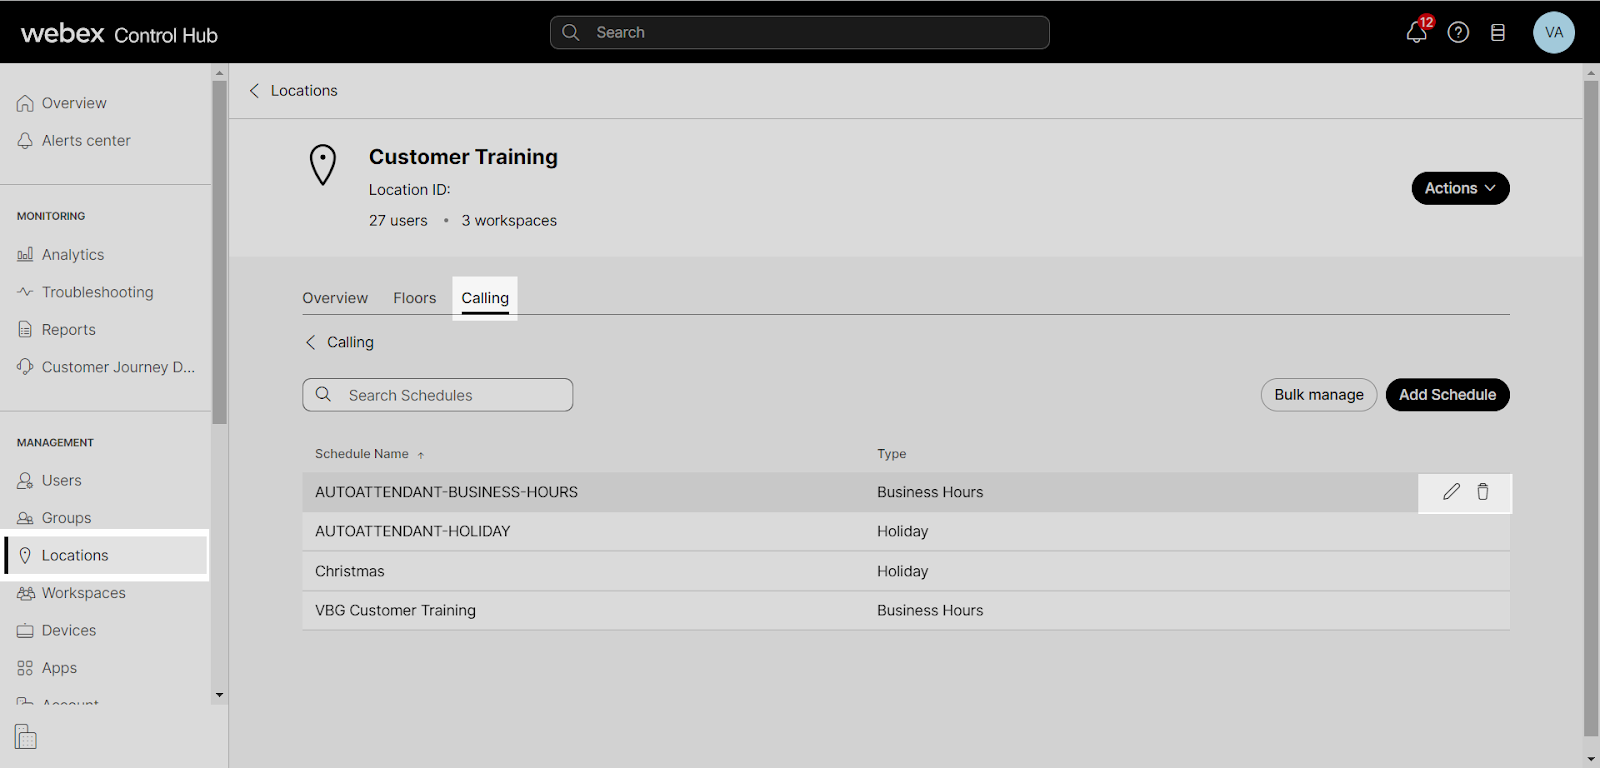
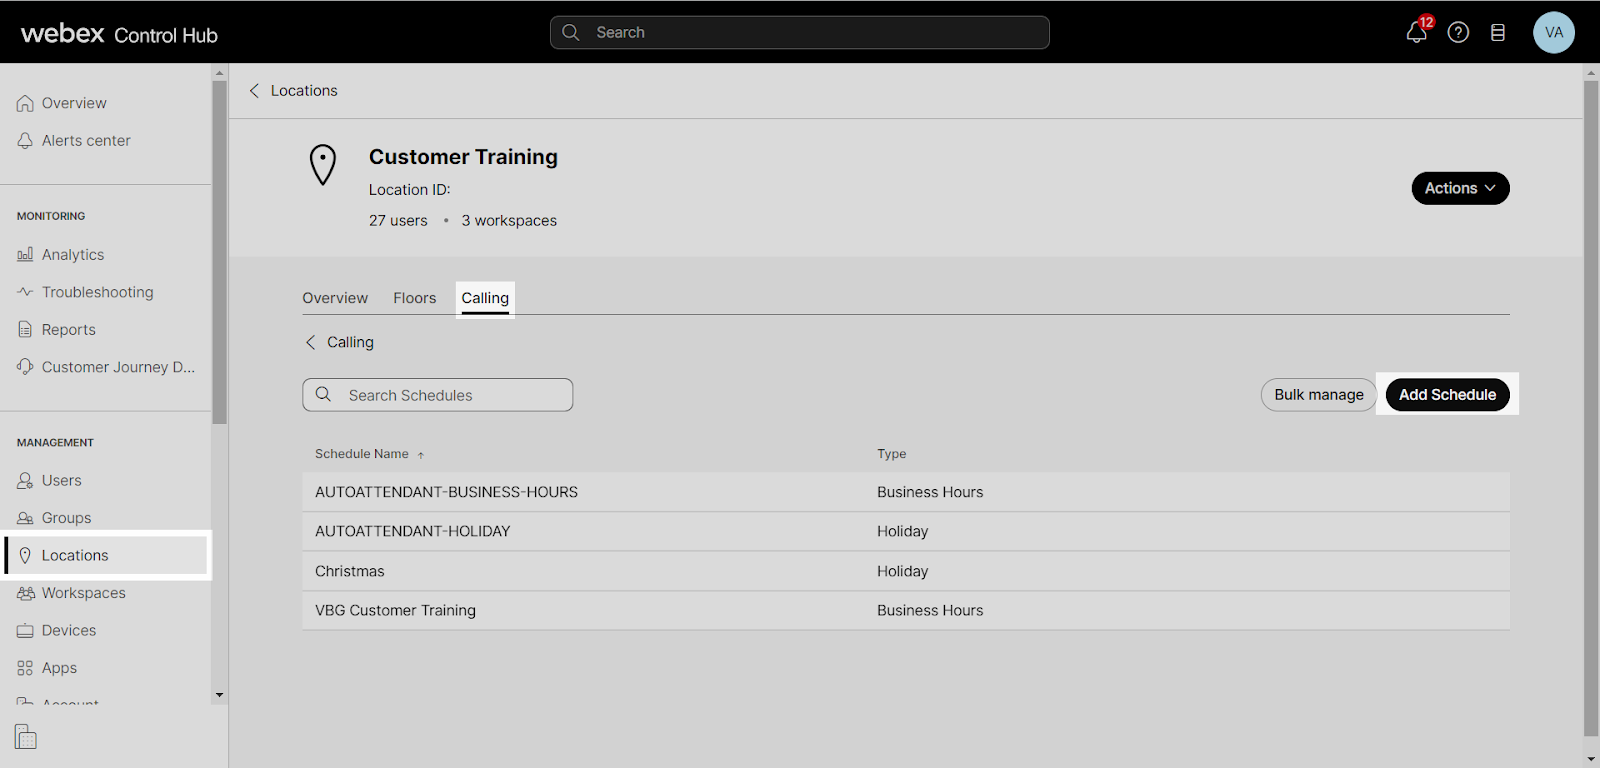
- From Control Hub, go to Management and select Locations.
- Select the location where you would like to create a new schedule.
- Select Calling.
- Under Call features settings, select Schedules.
- Select Add Schedule.
- Enter the Schedule Name.
- Choose the schedule type - Business Hours or Holiday.
- For Business Hours, determine the schedule for your working hours during the day, and do the following:
- Select the days that your business is open.
- Specify the opening hours for each day.
- If your business has a lunch break, select the lunch break and edit the hours that apply to every business day.
- Select Save.
- For Holiday, create a schedule for specific days during the year when your organization is not open, and then do the following:
- Enter a Holiday Name.
- Select the Recurrence by choosing None, Weekly, or Yearly.
- If the holiday is an all-day event, check the box next to All Day.
- In Holiday Duration, select the Day or Date, and enter the details, depending on the recurrence.
- Select Save.
Modify an existing schedule
- From Control Hub, go to Management and select Locations.
- Select the location where you would like to modify a schedule.
- Select Calling.
- Under Call features settings, select Schedules. Here you see a list of the schedules developed for this location.
- To edit, select the Edit icon.
When modifying an existing schedule, you can’t change the Schedule Type.
- To delete a schedule, select the Trash icon.
You can’t delete a schedule if it is active and assigned to a feature, for example, an auto attendant.
- To export a schedule as a .CSV file, select the schedule and then select the Download icon.