Manage hunt groups for a location
Hunt groups are used to ring specific groups of users in a predetermined pattern within or across locations when a call is made to the hunt group telephone number. In this guide, we review how an administrator can create and modify a hunt group within Control Hub.
Create a new hunt group
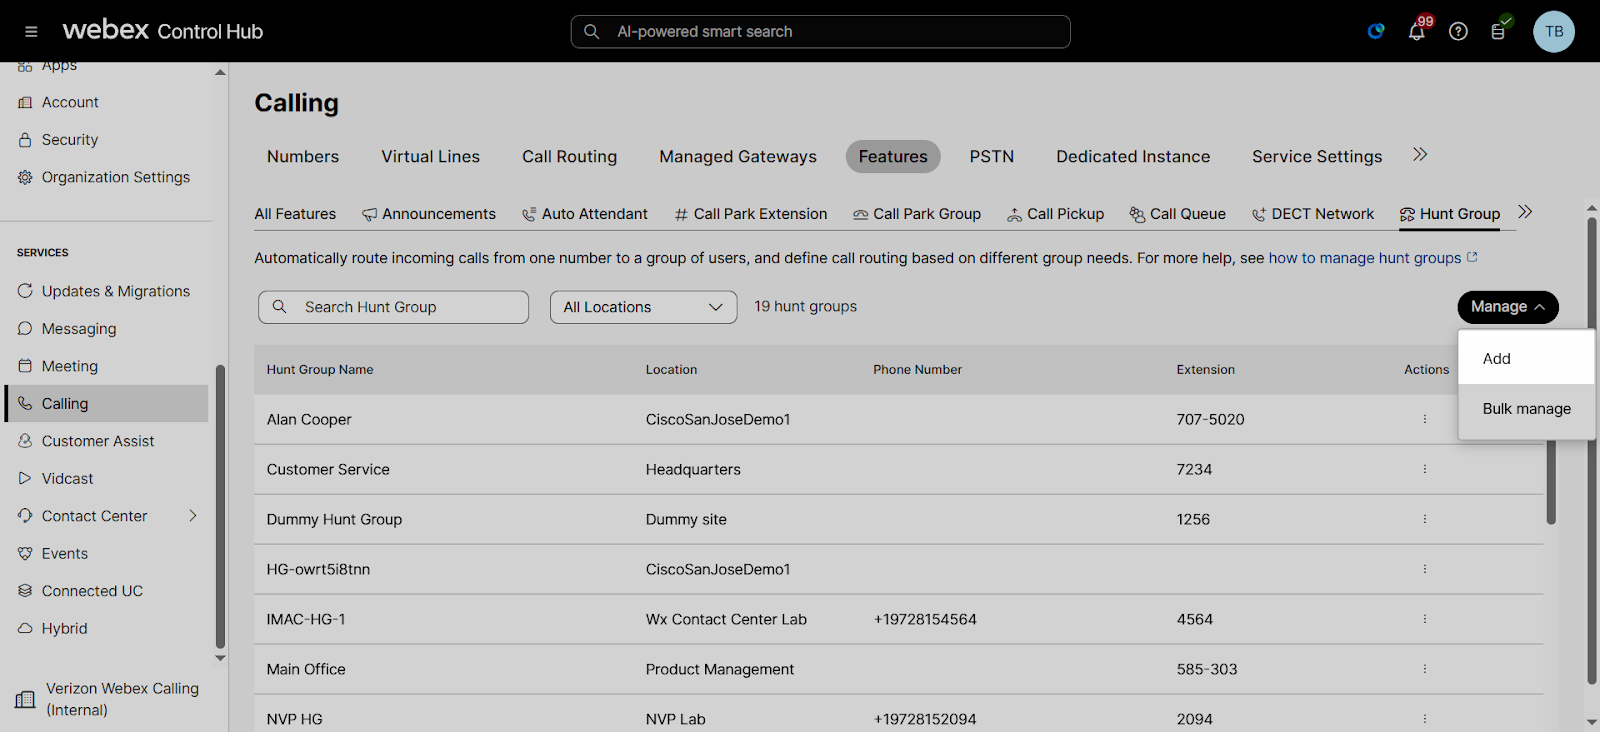
- From Control Hub, go to Services and select Calling.
- Select Features and then Hunt Group.
- Select Manage > Add.
- On the Basics page, enter the following information:
- Location - Where you would like to assign this hunt group.
- Hunt Group Name - This is used to identify the hunt group later on.
- Phone Number and/or Extension
- Caller ID - The caller ID is used for calls that are forwarded outside of the hunt group.
- Language - Used for audio announcements for this hunt group.
- Click Next.
- On the Call Routing page, choose the call routing to assign to the hunt group:
- Circular - Sends calls to users one-at-a-time, always ringing the users in the same order.
- Top Down - Sends the calls through the queue of members in order, starting from the top each time.
- Longest Idle - Sends calls to the user who has been idle (that is, not on a hunt group call) the longest.
- Weighted - Sends calls to idle members based on percentages you assign to each member of the hunt group (up to 100 percent).
- Simultaneous - Sends calls to all members assigned to the hunt group at once.
- Toggle on Advance after a set number of rings and enter the number of rings to apply to your call routing choice, if needed.
- Click Next.
- On the Routing Settings page, you can enable one or more of the following options:
- Advance when busy - The hunt group won't ring members when they are on another call, and advances to the next member in the hunt group. If the member has call waiting enabled and the call is advanced to them, then the call waits until the member becomes idle again.
- Forward after a set number of rings - Unanswered calls after a defined number of rings forwards to a designated number.
- Divert calls when unreachable - Unanswered calls divert to a defined phone number. This could apply to phone calls that aren't answered due to a network outage, or all members of the hunt group are busy and the Advance when busy option is also enabled.
- Click Next.
- On the Select Agents page, you can select the users or workspaces you would like to assign to this hunt group. Make your selection and click Next.
- Review your hunt group settings and click Create to confirm and save.
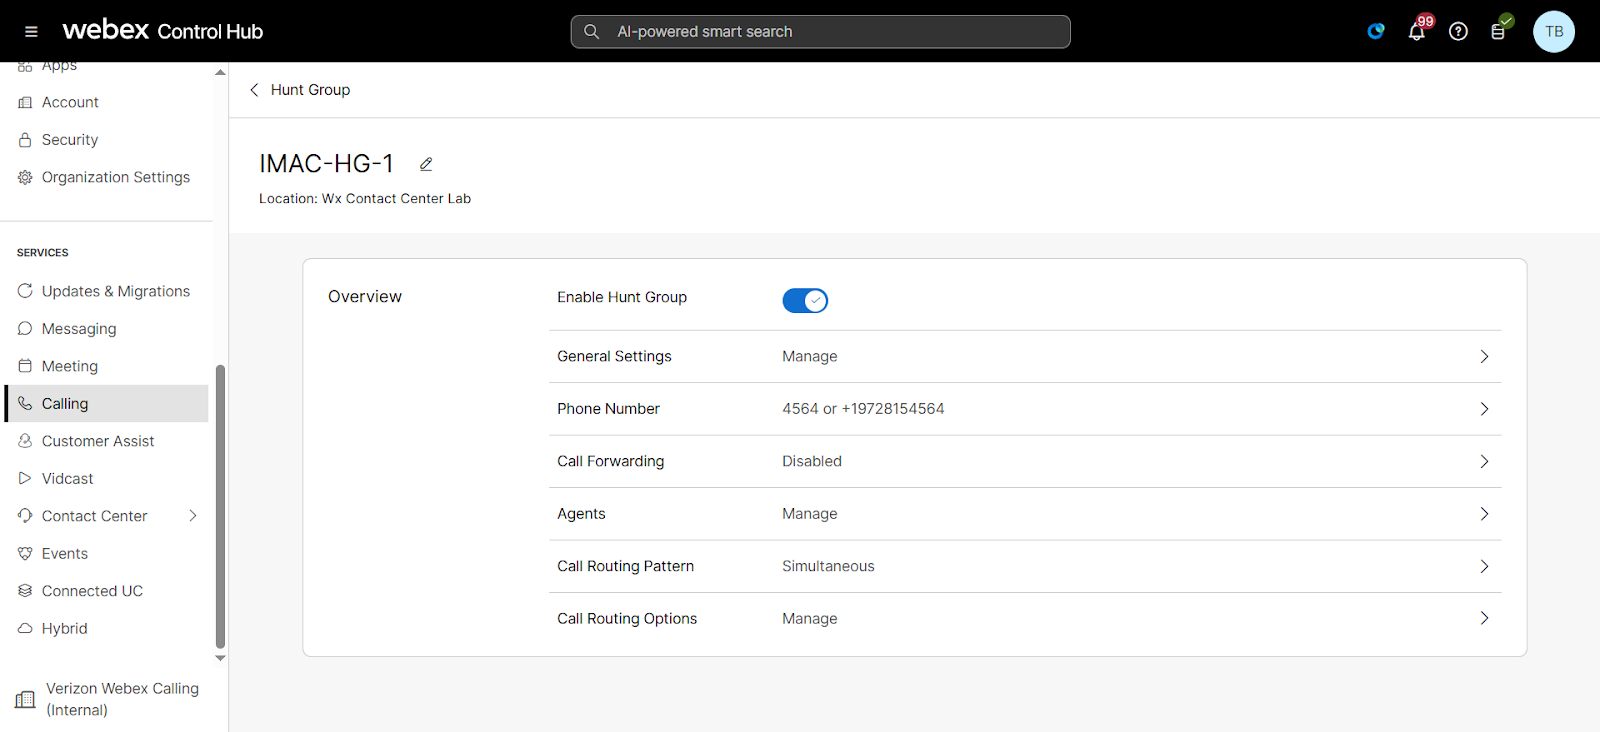
Modify a hunt group
- From Control Hub, go to Services and select Calling.
- Select Features and then Hunt Group.
- Select the hunt group you’d like to modify.
- To enable or disable, select the toggle.
- Select General Settings to modify the assigned Language, Time Zone, or Calling ID First and Last Name. This is used when call forwarding is enabled and calls are forwarded out of this hunt group.
- Select Phone Number to modify the assigned phone number and/or extension.
- To assign alternate numbers to the hunt group, select the phone numbers you would like to add. With the alternate numbers feature allows you to assign up to 10 phone numbers or extensions to a hunt group. Each number will reach the same greeting and each menu will function identically to the main number.
- Enable Distinctive Ring Pattern, if you would like to identify calls coming from specific phone numbers.
- Select Call Forwarding to modify the call forwarding settings for the hunt group. To enable, select the toggle. Then choose one of the following options:
- Always Forward Calls will forward all calls to the designated number you enter here.
- Selectively Forward Calls will forward calls to a designated number based on the criteria you determine. If you choose this option, you will need to have at least one rule for forwarding applied and active.
- Select Add When to Forward or Add When Not to Forward to create a rule. Enter the Rule Name.
- Select a Business Schedule and Holiday Schedule.
- For Forward To, select either Default Phone Number or add a Different Phone Number.
- For Calls From, select Any Number or Selected Numbers with at least one option from the following:
- Any Number - Forwards all calls in the specified rule.
- Any Private Numbers - Forwards calls from private numbers.
- Any Unavailable Numbers - Forwards calls from unavailable numbers.
- Add Specific Numbers - Forwards calls from up to 12 numbers that you define.
- For Calls To, select a number or alternative number from the drop-down list, so that calls are forwarded when a call is received to this number. Select Save to save your changes.
Once a rule is created, you can enable, disable, edit, or delete the rule from the table.