
Manage group voicemails
The voicemail group feature allows administrators to create a shared voicemail box and inbound fax box to assign to users or services like auto attendance, call queues or hunt groups. You can set up message notifications, choose where you want messages stored and customize the mailbox greeting.
Create a voicemail group
- From Control Hub, go to Services and select Calling.
- Click Features and then Voicemail Group.
- Click Manage and then Add.
- Enter the following information, and then click Next.
- Location - Where this voicemail group service is assigned.
- Voicemail Group Name - The name used to identify this voicemail group.
- Phone Number - Assign a phone number and/or extension.
Note: For fax service, a separate, full phone number is required. For only voicemail service, a phone number is optional. - Caller ID First Name and Last Name - Presented when calls are transferred or forwarded out of this voicemail group.
- Voicemail Passcode - Use this code to access the voicemail group when you are calling.
- Enter the following information, and then click Next.
- Language - Select the language for the audio announcements.
- Message Storage - Choose where messages are stored.
- New Message Notification - Receive notifications of any new voicemails or faxes to an email address. If enabled, enter the email address.
- Fax Messaging - Enable this to allow this voicemail group to receive fax messages.
- Additional Voicemail Settings - Choose one or both of the following:
- Check the Transfer to '0' to phone number check box, and enter the phone number to which callers are transferred.
- Check the Email a copy of message check box, and enter the email address to which the recording of all voicemails are sent.
- Review your new voicemail group settings to make sure everything is correct. You can click Back to make any changes, or click Create to apply the settings to your new voicemail group.
- Click Done when completed.
If you’ve set up the voicemail group for a specific work group or specific users, you’ll need to share the voicemail group number and passcode with these users or groups. You'll also need to add a phone number or extension to the voice portal if you haven't done so already.

Enable or disable a voicemail group
- From Control Hub, go to Services, then choose Calling > Features.
- Click Voicemail Group and then select the voicemail group to edit.
- In the side panel, select the arrow next to Voicemail.
- Use the toggle to enable or disable this voicemail group service.
- Click Save to save your changes.
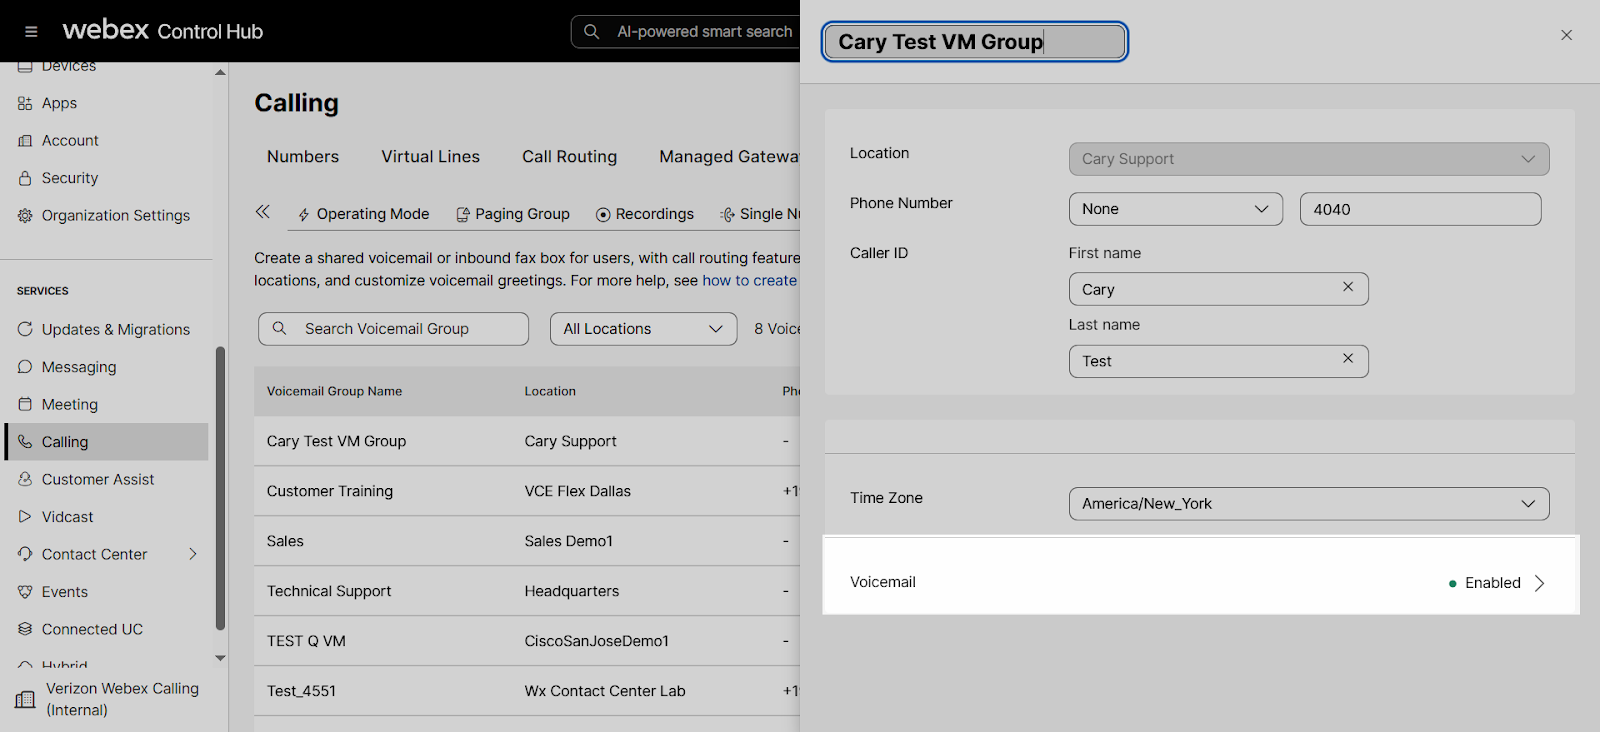
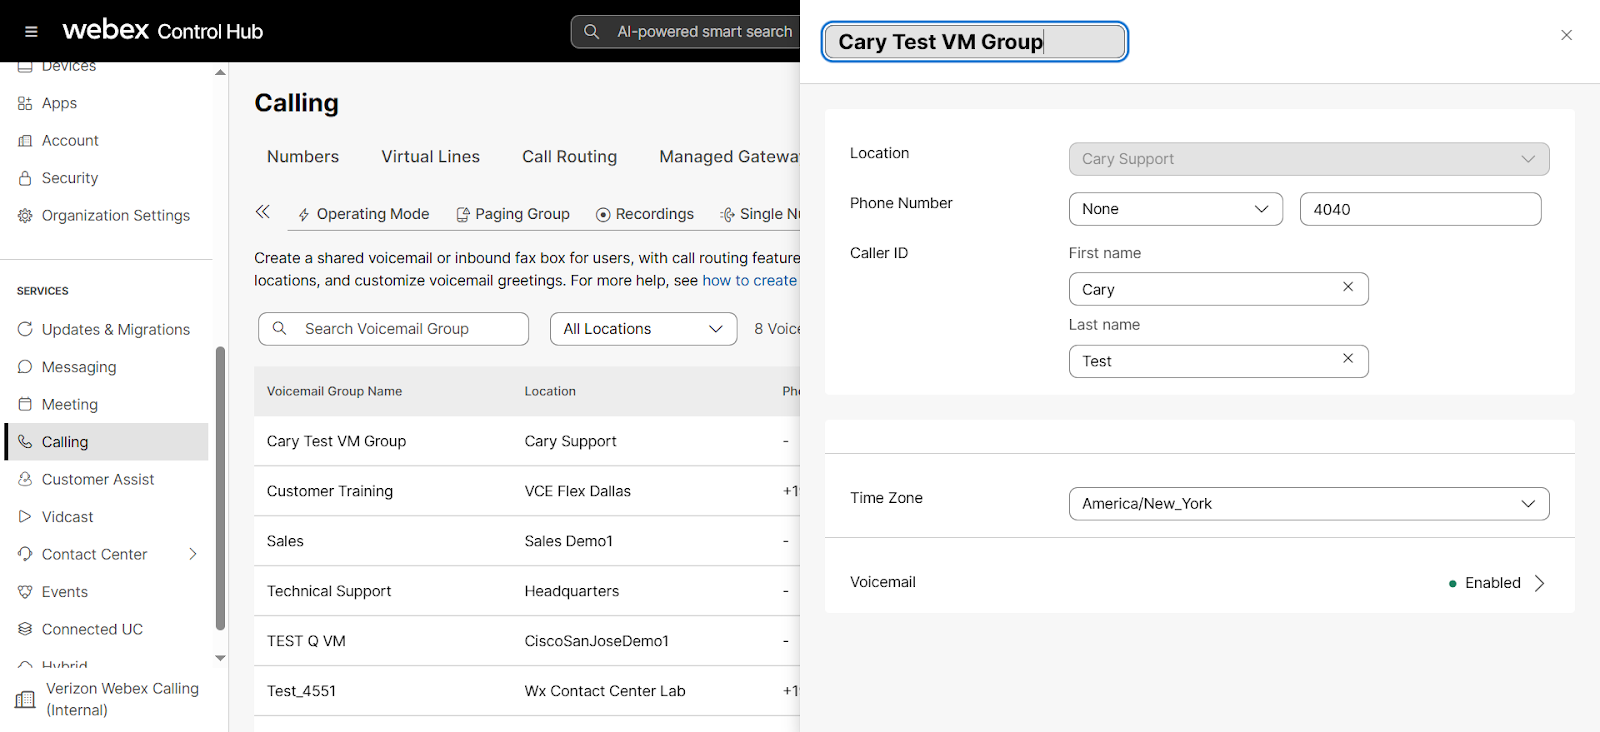
Edit a voicemail group’s settings
- From Control Hub, go to the Services, then choose Calling > Features
- Click Voicemail Group and select the voicemail group to edit.
- You can edit the Phone Number and/or Extension and the Caller ID.
The location can't be changed. You have to delete this voicemail group and recreate it to change the location.
- Select the arrow next to Voicemail to edit the additional voicemail settings.
If the voicemail group service is disabled, the additional settings don't appear.
- Language applies to the audio announcements.
- If needed, choose the message that is played when callers reach this voicemail.
- Default Greeting - Plays a default greeting for incoming calls.
- Custom Greeting - Upload an audio file, or record a greeting using the recording function.
- Enable or disable this voicemail group to receive fax messages.
This option may be unavailable if voicemail forwarding is disabled.
- You can choose one or both of the following:
- Check the Transfer to '0' to phone number check box, and enter the phone number to which callers are transferred. Note: If you select this option, make sure your voicemail greeting informs callers that pressing '0' will transfer them.
- Check the Email a copy of message check box, and enter the email address to which the recording of all voicemails are sent.
- If needed, change the passcode for this voicemail group.
- Once you have completed all of your edits to the voicemail group, click Save.
Access voicemail messages in a group inbox
- From any phone, dial the voice portal phone number. Or, from a Cisco IP Phone, press the Messages key. When prompted, enter the voicemail group phone number or extension.
- Then enter the passcode for the voicemail group and follow the voice prompts.
