Manage paging groups
The group paging service allows a user to set up a one-way call to a group of up to 75 target users by dialing a single number or extension. Multiple paging groups can be set up for different departments or teams. Group paging can be a cost-efficient alternative to having an overhead paging system installed. Or, it is an effective tool for when overhead paging would reach too many audiences.
For example, if a grocery store manager needs to relay a message to the entire deli department, all of the deli employees can be added to a single group. That way, when the manager has an announcement or needs to reach the department, the group paging service is available to reach the group by dialing one number or extension.
Feature notes
What to know before getting started:
- A user can be assigned as both a paging target and paging originator in a paging group.
- A location can have multiple group paging services configured since users can be defined as a paging originator and/or a paging target in multiple paging groups.
- If a user is not on the phone, the call from a group page is automatically answered and the target hears a “paging” announcement to alert them they are receiving a page.
- If a target is on a call, the page is not automatically answered. If a target chooses not to answer the page, the group paging call will not forward to the target’s voicemail.
- If a target has do not disturb enabled on their phone, they are not called by the group paging service.
- If a target has call forwarding services enabled, the group paging call will not forward to the configured call forwarding destination.
- If a target has single number reach or simultaneous ring enabled, the configured destination service will not be called by the group paging service.
- When the page is set up to the targets, the originator receives a “Paging System Ready” announcement, alerting them to begin speaking.
- The group page is a one-way audio service. The paging originator has a one-way talk path to the paging targets. The paging targets do not have a talk path to each other or to the paging originator for the duration of the page.
- Paging groups only work with Cisco IP Phone 7800 or 8800 series, not analog telephone adapters (ATAs).
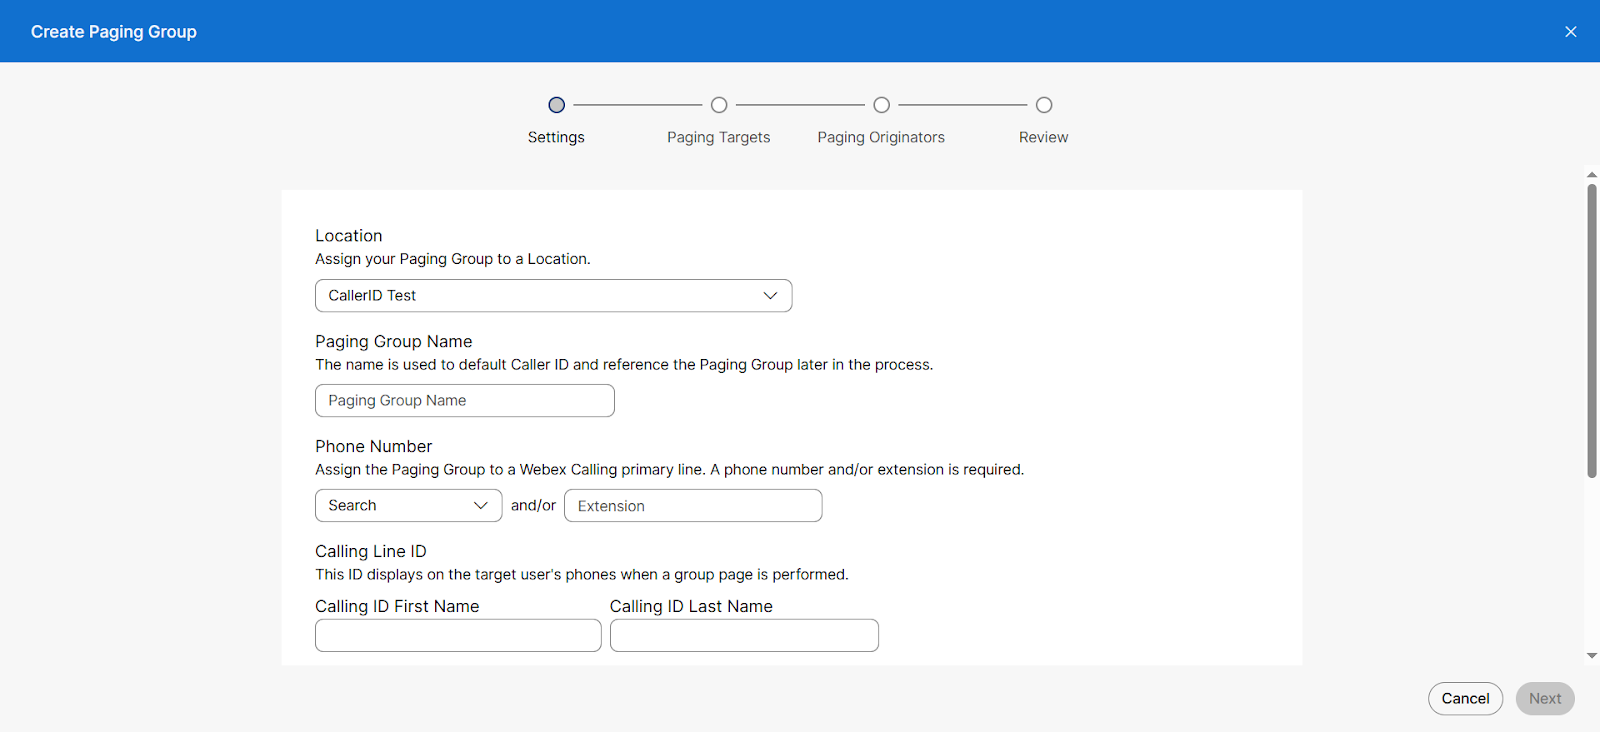
Create a paging group
- From Control Hub, go to Services and select Calling.
- Select Features and then Paging Group.
- Select Manage > Add.
- Enter the following information for the paging group you’d like to create:
- Location - Assign your paging group to a location.
- Paging Group Name - This name is used to identify the paging group later on.
- Phone Number - Enter a phone number and/or extension.
- Language - Choose the language.
- Calling Line ID First Name and Last Name - This ID displays on the target user’s phones when a group page is performed.
- Calling ID Label - This determines what is shown on a paging target user’s caller ID when a group page is performed.
- Paging Group ID - Displays the Calling Line ID name.
- Page Originator - Displays the Calling Line ID name and number of the user who originates the page.
- Language - Select the paging group language.
- Select Next to save and continue.
- Add the Paging Targets for this paging group from the users and/or workspaces drop-down menu.
- Check the box next to Copy my paging targets to my paging originators to copy added users for paging originators in the next section.
- Select Next to save and continue.
- Add the Paging Originators for this paging group from the users and /or workspaces drop-down menu.
- Select Next to save and continue.
- Review the settings you’ve determined and select Create to save.
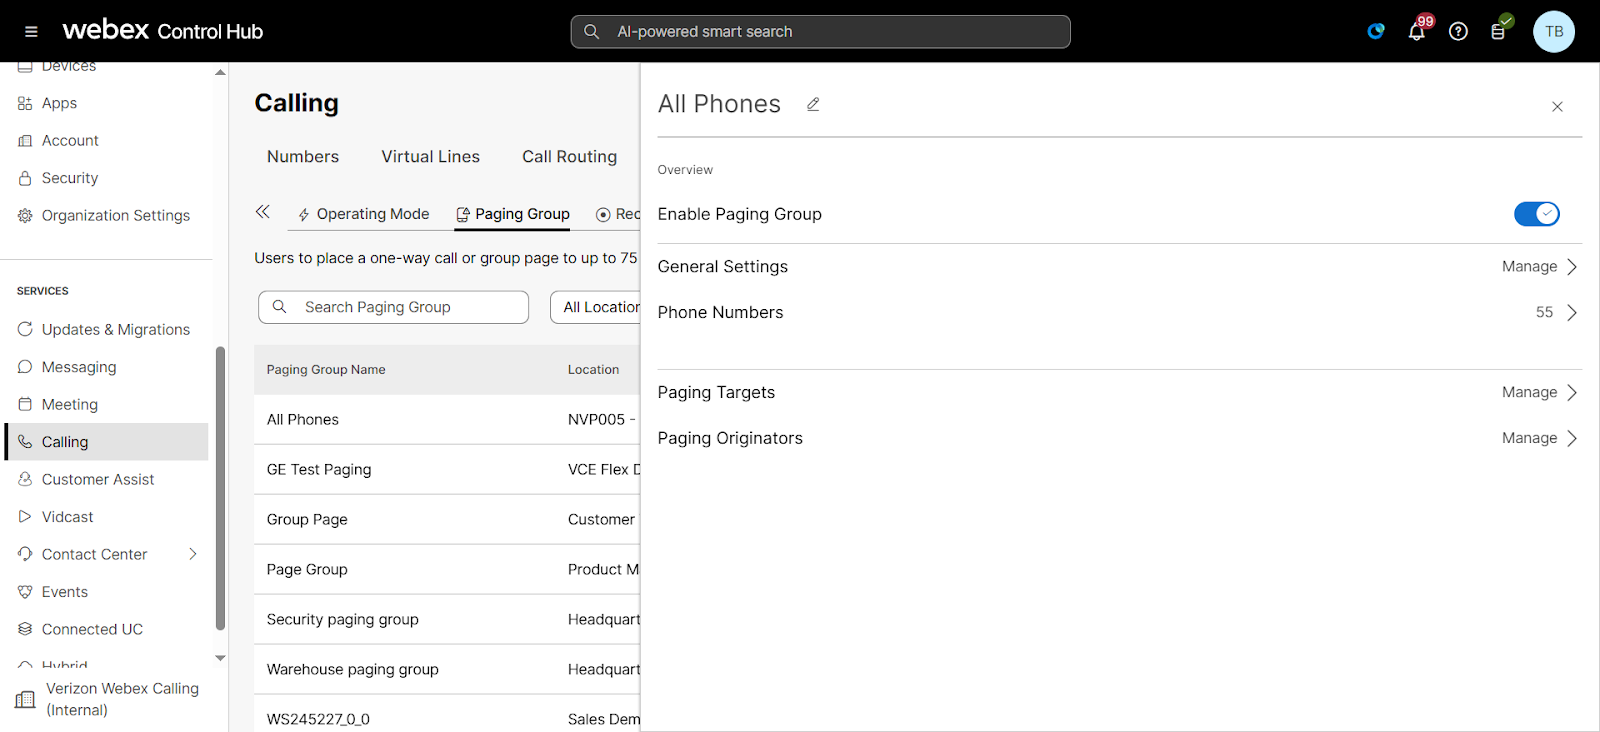
Modify a paging group
Administrators can make changes to existing paging groups, as needed. To do so, follow these steps:
- From Control Hub, go to Services and select Calling.
- Select Features and then Paging Group.
- Select the paging group you would like to modify. Here you can edit the following settings:
- General Settings - Edit the Location, Calling Line ID and Calling ID Label for the paging group.
- Phone Number - Edit the Phone Number or Extension for the paging group.
- Paging Targets - Edit, add or delete the list of users and workspaces that can receive the paging announcement.
- Paging Originators - Edit the list of users and workspaces that can initiate the paging announcements.
- Select Save to save your changes.