
Get started for administrators (part 1)
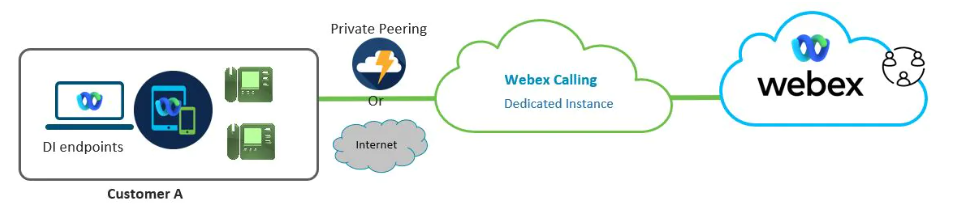
Webex Calling's Dedicated Instance is an optional add-on that must be purchased before activation can proceed. Dedicated Instance can be activated as part of the First Time Setup Wizard (FTSW) or deferred and carried out from Control Hub later.
This guide provides information on DI activation and access in Control Hub, Borderless CTI, Alerts Center, Integrated Audio Configuration for Webex Calling, and E911 Configuration.
Activate Dedicated Instance
You will receive a welcome email to set up the services when Dedicated Instance is purchased, either as part of the initial Webex Calling order or later added to the subscription. You can activate the service by going to the First Time Setup Wizard and selecting Set up Dedicated Instance after creating the order. You can also choose to complete the activation later and skip this step.
At the point when you select to set up Dedicated Instance, three input values should be provided. You must specify the region(s) because Dedicated Instance is deployed and activated for a specific location. For each Dedicated Instance region, you must also enter the user and workspace device count. When Dedicated Instance is activated, these parameters are used to determine its size.

As part of service activation, the following UC applications are deployed and sized by us based on the numbers provided in the FTSW for Knowledge Workers and Workspace devices for a region:
- Cisco Unified Call Manager
- Cisco Unified Unity Connection
- Cisco Unified IM and Presence
- Cisco Expressway-Core and Edge
- Cisco Emergency Responder (only in AMER region)
In addition, as part of the activation, SIP connectivity is established between the Webex Calling Dedicated Instance and Multi-tenant platforms for inter-op calls.
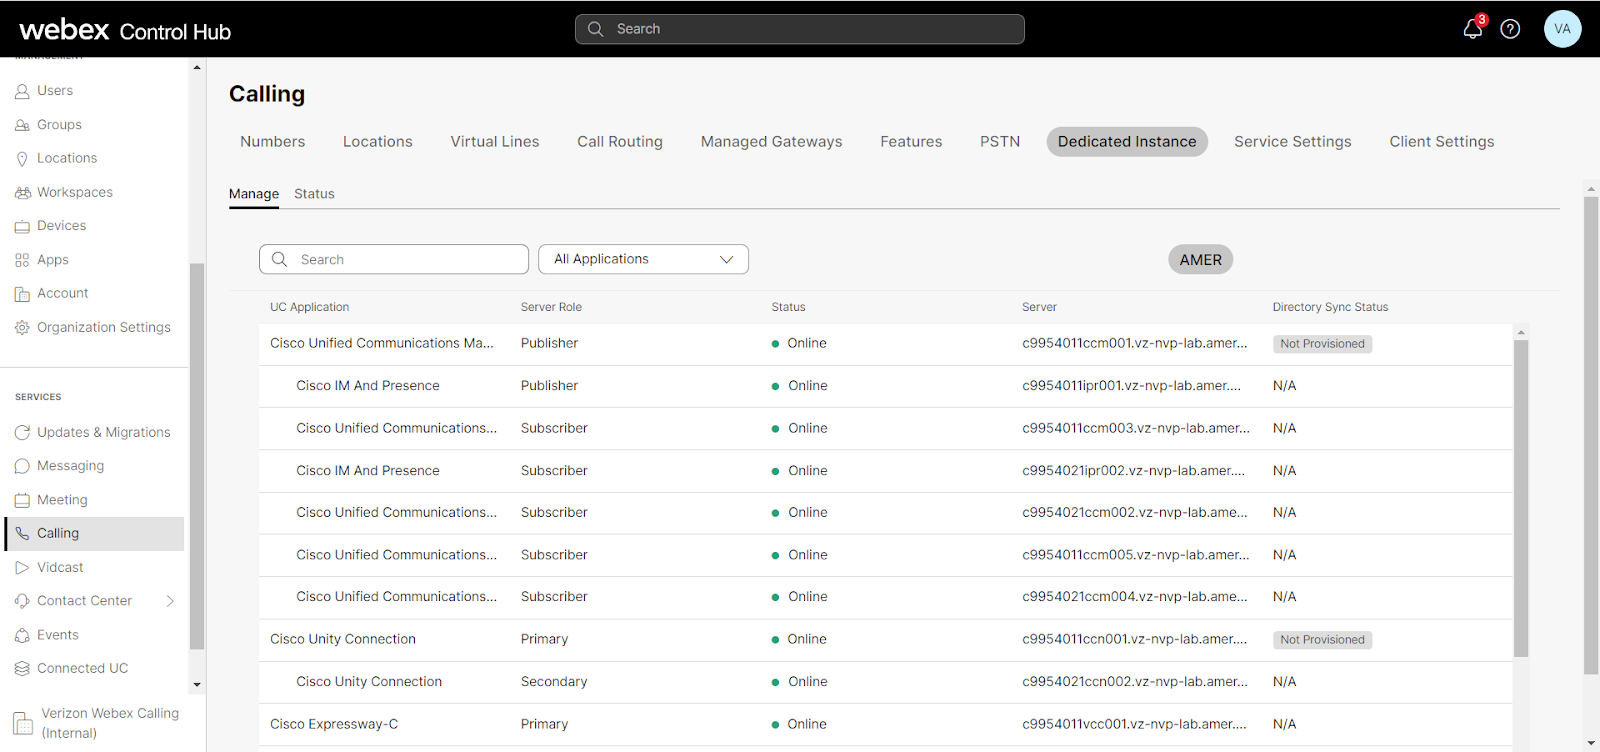
Upon successful completion of the service activation, the UC apps will appear in the Calling > Dedicated Instance > Manage tab.
Default inter-op Trunk and Dial Plan Configurations
After a Dedicated Instance is activated, basic dial plan elements for call routing are configured in both the Webex Calling multi-tenant platform and each of the Dedicated Instances. If you require call routing between the platforms, you must incorporate these elements into the Webex Calling and the Dedicated Instance UCM dial plan accordingly.
Configured Webex Calling Dial Plan Elements:
- Location
- SIP Trunk
- Route Group
Configured Dedicated Instance (Cisco Unified Communications Manager) Dial Plan Elements:
- SIP Trunk
- Route Group
- Route List
The pre-configured dial plan elements in the multi-tenant platform are prefixed with ‘WXC-DI.’ For example, WXC-DI-<region>-<dial plan element>.
The pre-configured dial plan elements in Cisco Unified Communications Manager are prefixed with ‘xWxC.’ For example, xWxC-<region>-<dial plan element>.
As an administrator, you need to configure the Main Number (E.164) for the location created in the multi-tenant before any calls can be made.
It is required to add a PSTN connection before proceeding to add the Main number.
Note: You are advised not to modify or delete any of the above pre-configured interoperability dial plan elements; otherwise, it can cause call failures between the platforms.
Configure PSTN Connection
You are required to configure a PSTN connection before adding a Main Number.
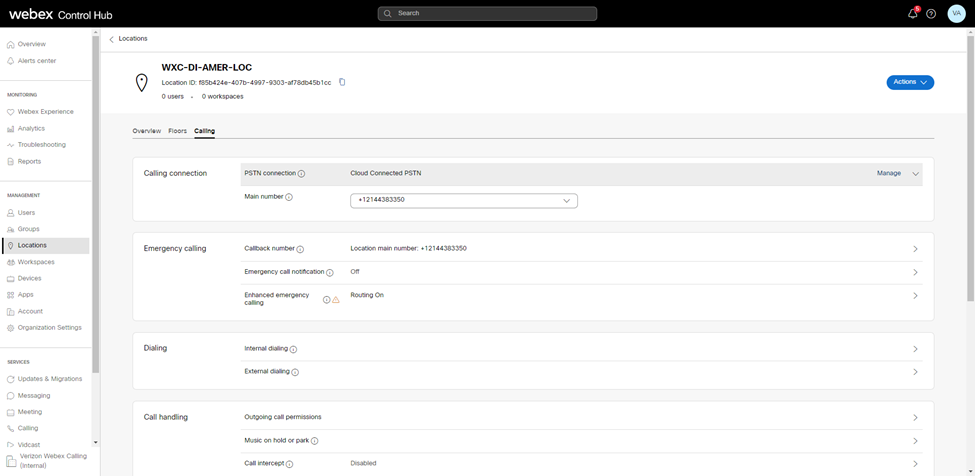
- Sign in to Control Hub.
- Go to Management > Locations.
- Select the default location created by Cisco (prefixed with 'WXC-DI' for a particular region).
- Select Calling, and on the right pane, against PSTN Connection, click Manage.
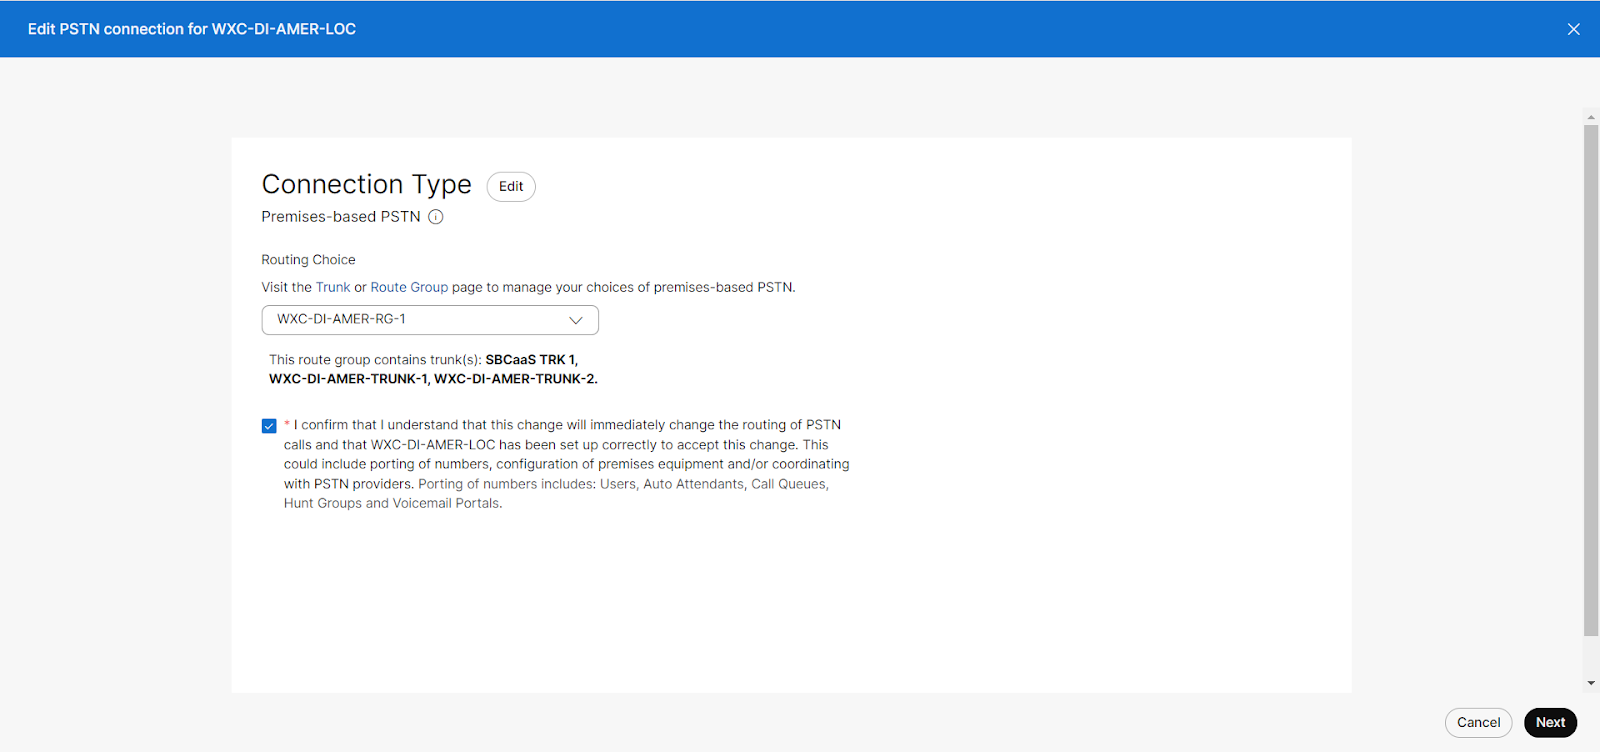
- On the Connection Type window, select the default Route Group created by Cisco (prefixed with 'WXC-DI' for that particular region) from the Routing choice drop-down list, check the disclaimer checkbox, and click Next.
- Click Done (add number later) if you wish to add the Main Number later; else, click Add Numbers now to continue to add the Main Number to make and receive calls.
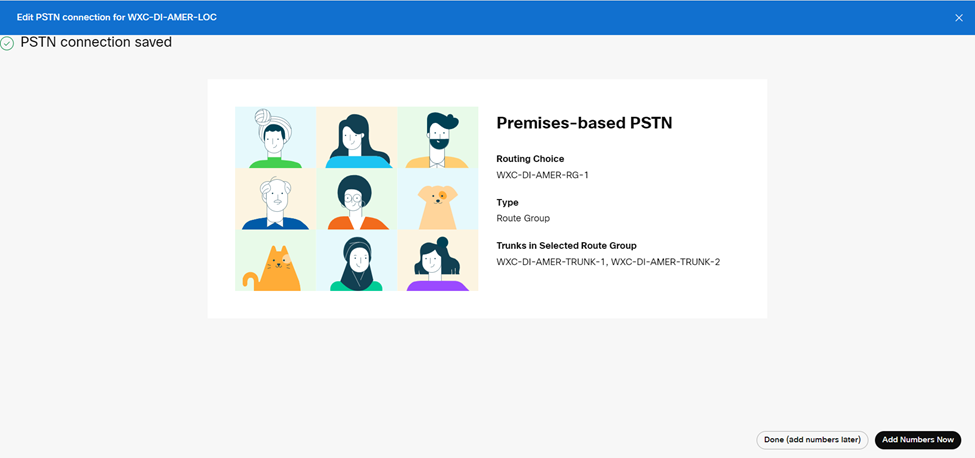
You can only make or receive calls once the main number is added to this default location.
Access applications
The Unified Communications applications' features and services are administered using the native application portals and accessed from the Dedicated Instance configuration tab in Control Hub.
The administrator can view the UC application's networking and data center information by clicking on Calling > Dedicated Instance > Manage > UC application, which opens a right pane in Control Hub.
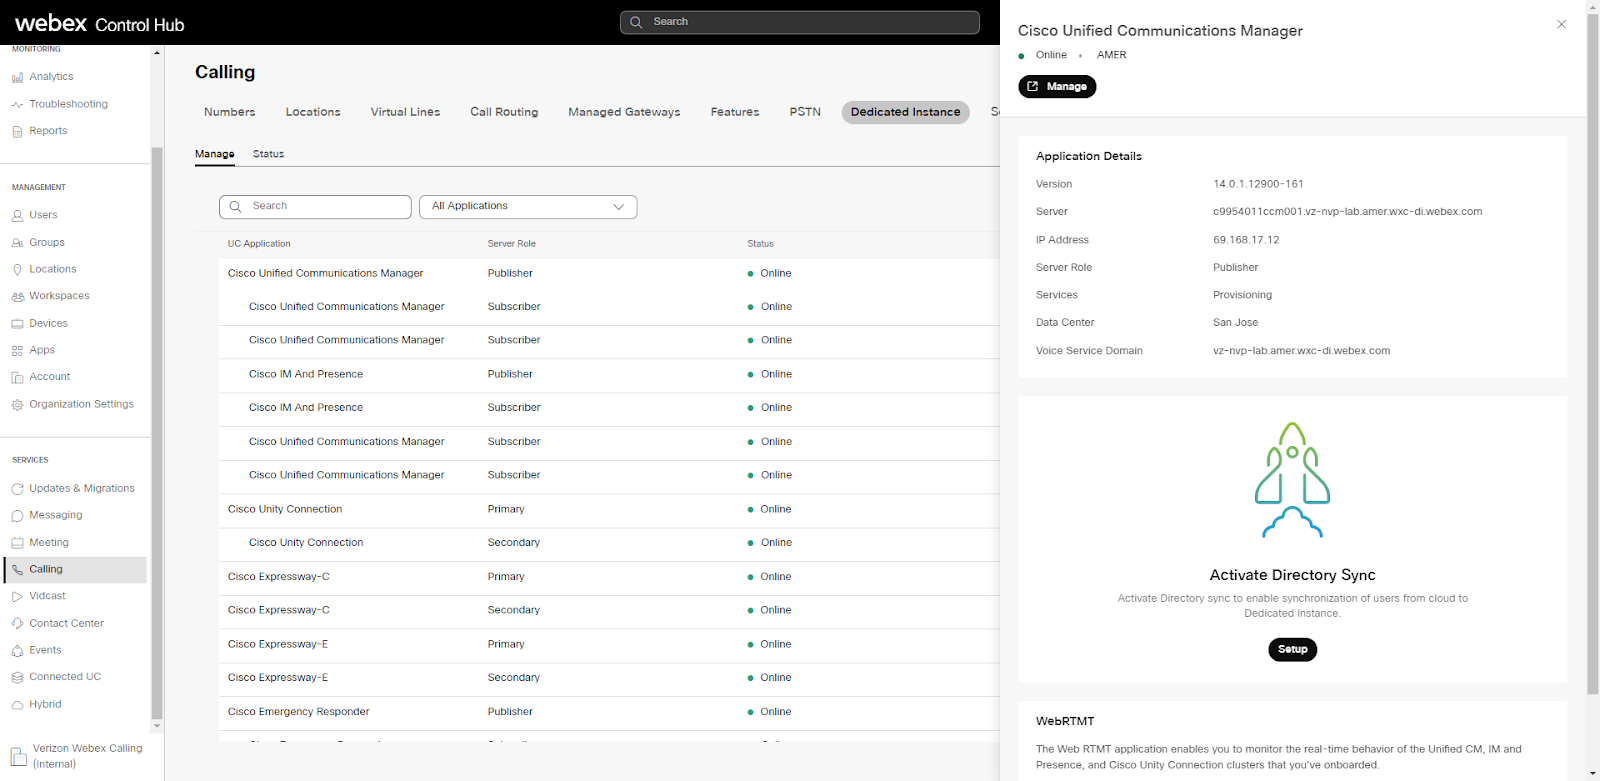
The following details are displayed on the right pane:
- Version - Current version of the UC application.
- Server - Fully qualified domain name of the UC application.
- IP address - Internal IP address of the UC application.
- Server Role - Indicates whether the node is a Publisher/Primary or Subscriber/Secondary.
- Services - Provides a list of only those services that are activated on the node.
The list of services available are:
- Provisioning (only for Publisher).
- Call Processing.
- CTI Manager.
- Music on Hold (MOH).
- Trivial File Transfer Protocol (TFTP).
The sync is scheduled every 24 hours for the changes made in the application to reflect in Control Hub. - Datacenter - Datacenter where the node is deployed.
- Voice Service Domain - Voice service domain for Internal and MRA registrations.
- Public IP address — Internet-facing IP address (applicable only for the Expressway Edge nodes).
Borderless CTI
The Borderless CTI feature supports you over the internet (MRA users). This feature enables you to control Desk-phone control and Extend and Connect.
Borderless CTI provides:
- Deskphone control: If you want to connect the Webex App to a desk phone to handle calls (dial digits, make calls, end calls, etc).
- Extend & Connect: If you want to use the Webex App to make and receive calls using a home or hotel phone because your PC hardware or available network connection does not support VoIP.
To use Borderless CTI, you must configure the CTI Application.
- Borderless CTI is supported on WxApps on Desktops and VDI.
- WxApp on desktop covers both Windows and macOS.
Enable Borderless CTI
- Sign in to Control Hub.
- Navigate to Calling > Dedicated Instance > Manage tab.
The list of cluster groups with the description, status, clusters, and nodes appears. - Choose the Cisco Unified Communication Manager Publisher node, and the respective Cisco Unified Communication Manager card opens.
- Click Manage and sign in to the Cisco UCM Administration portal.
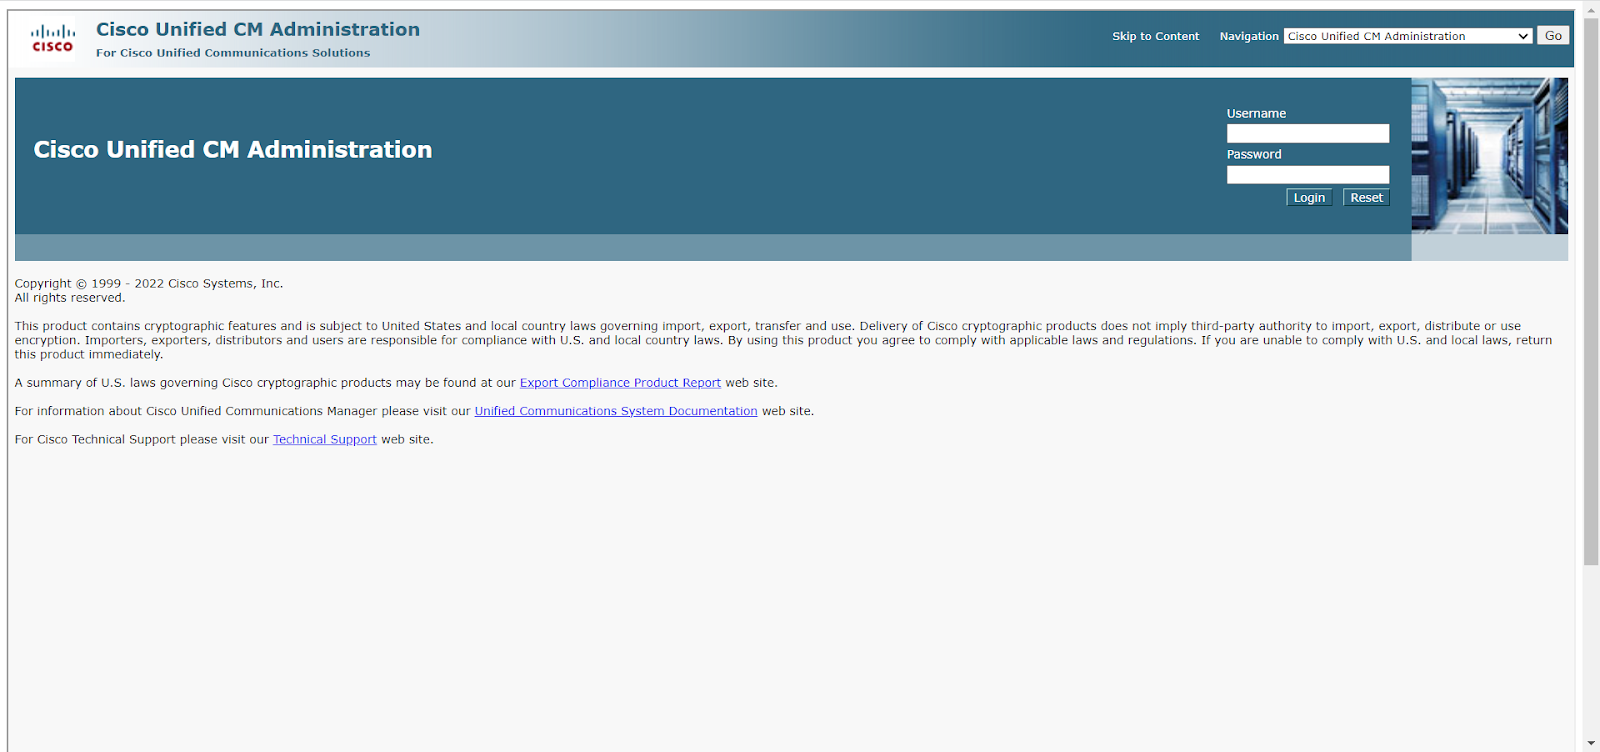
- Use the toggle button to enable Borderless CTI and follow the on-screen instructions to enable it.
Service-generated alerts
With the alerts center in Control Hub, you can view all important events and updates in one place.
Proactive alerts
Administrators can subscribe to day two or day three proactive alerts and event notifications and get the same delivered to either or both emails or spaces in the Webex App by selecting the Delivery Channel while creating the alert.
For example, CUCM Video Conf Bridge Out of Resource Count High, CUCM MTP Out of Resource Count High.
Maintenance alerts
With maintenance alerts, administrators can:
- Get notified over email when there is an outage or maintenance is scheduled, started, or ended for a UC application.
- Subscribe to maintenance and outage notifications.
- Get notified over email, team space, and Control Hub for maintenance alerts for a UC application.
- Set the banner of a cluster/s for a customer in Control Hub with the below status and notifies the customer in Alerts:
- Scheduled maintenance
- Start maintenance
In the event of maintenance, Control Hub automatically displays a banner including the details of the cluster, and the region, along with the date and time on which there is maintenance.
Create a new Rule
Only administrators with full admin rights can create rules.
- From Control Hub, go to the Alerts Center.
- Select Manage > Create rule.
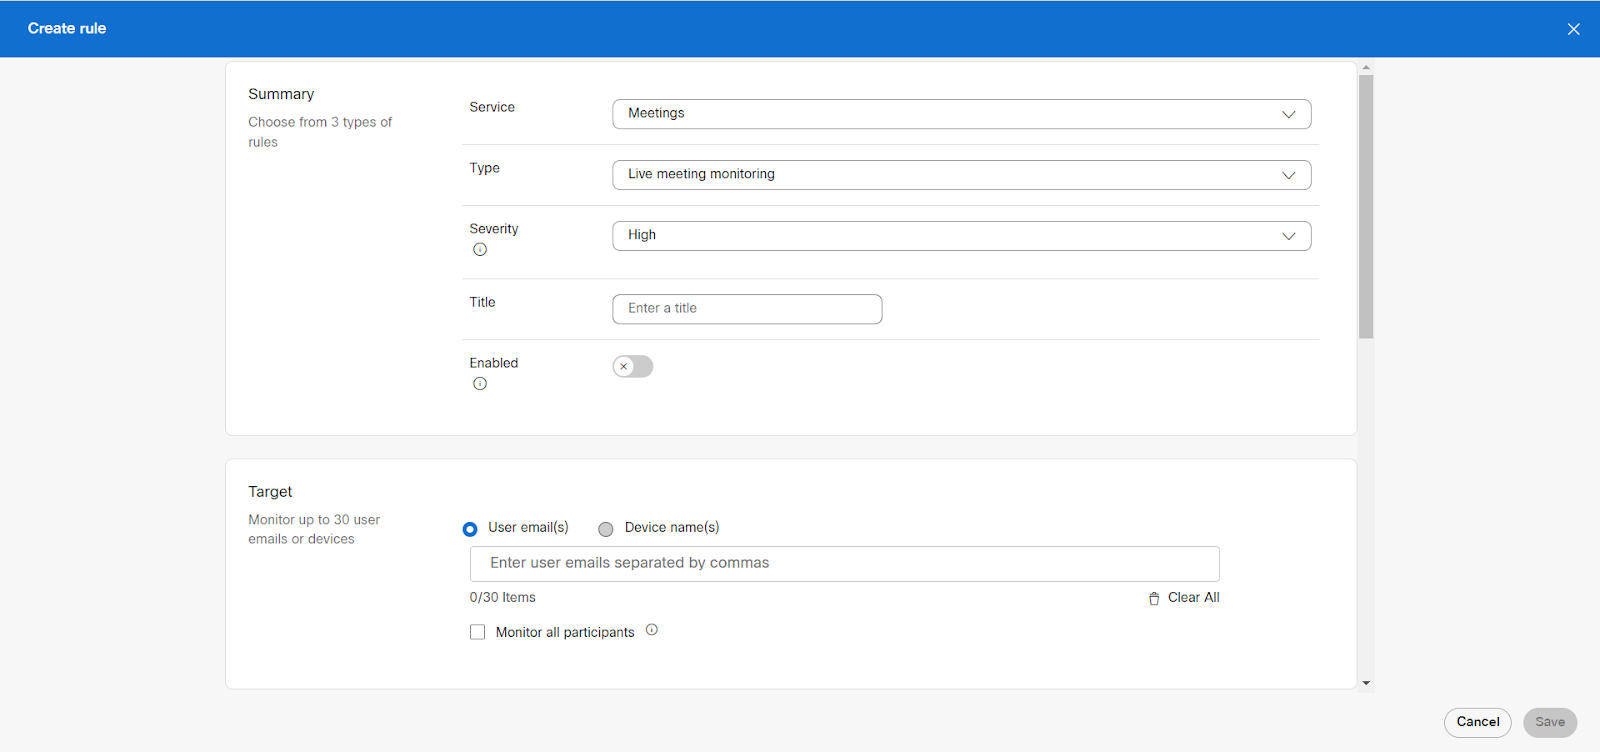
In the Summary section:
- Select Calling from the Service drop-down list.
- Select Alerts for Dedicated Instance from the Type drop-down list.
- Select the preferred Severity.
- Add a Title for the new rule.
3. All the checkboxes in the Rules section are selected by default. Uncheck the ones based on your preferences.
4. Select the Delivery Channel to receive the alert.
You can select Webhooks if you have Webhooks enabled at the organizational level.
5. Click Save.
Once the rules are created, it will take a maximum of 6 hours to start receiving the notifications.
Integrated Audio Configuration for Dedicated Instance for Webex Calling
Integrated audio allows you to join Webex Meetings using the call-in and call-back features without incurring PSTN charges by enabling on-net calling for Dedicated Instance customers and having PSTN as a backup routing method.
Cisco configured components
In Unified CM, SIP Trunks/Route Group/Route List are configured for Webex Meetings.
Note: The above configuration in Unified CM has names that are prefixed with an x (e.g., xUS1_AMER_WEA_TRK1, xUS_WEA_RG, xUS_WEA_RL).
Administrators are advised not to modify or delete any of the above pre-configured elements.
Integrated Audio for Webex Configuration
Admins are required to configure Integrated Audio call-back numbers by adding the DNS SRV record in Audio Settings so that when a call-back is being requested, the system is aware that the call is coming on an extension, and this is the internal number on which the meetings call back is to be redirected. Configure the following under Audio Settings in Webex Meetings:
Generate the LUA Script
- In Control Hub, Go to Meeting and choose the default configured site.
- Go to Audio Settings under the Common Settings tile and scroll down to Edge Audio Custom Call-in Numbers, configure the required parameters, and click Generate Lua Script.
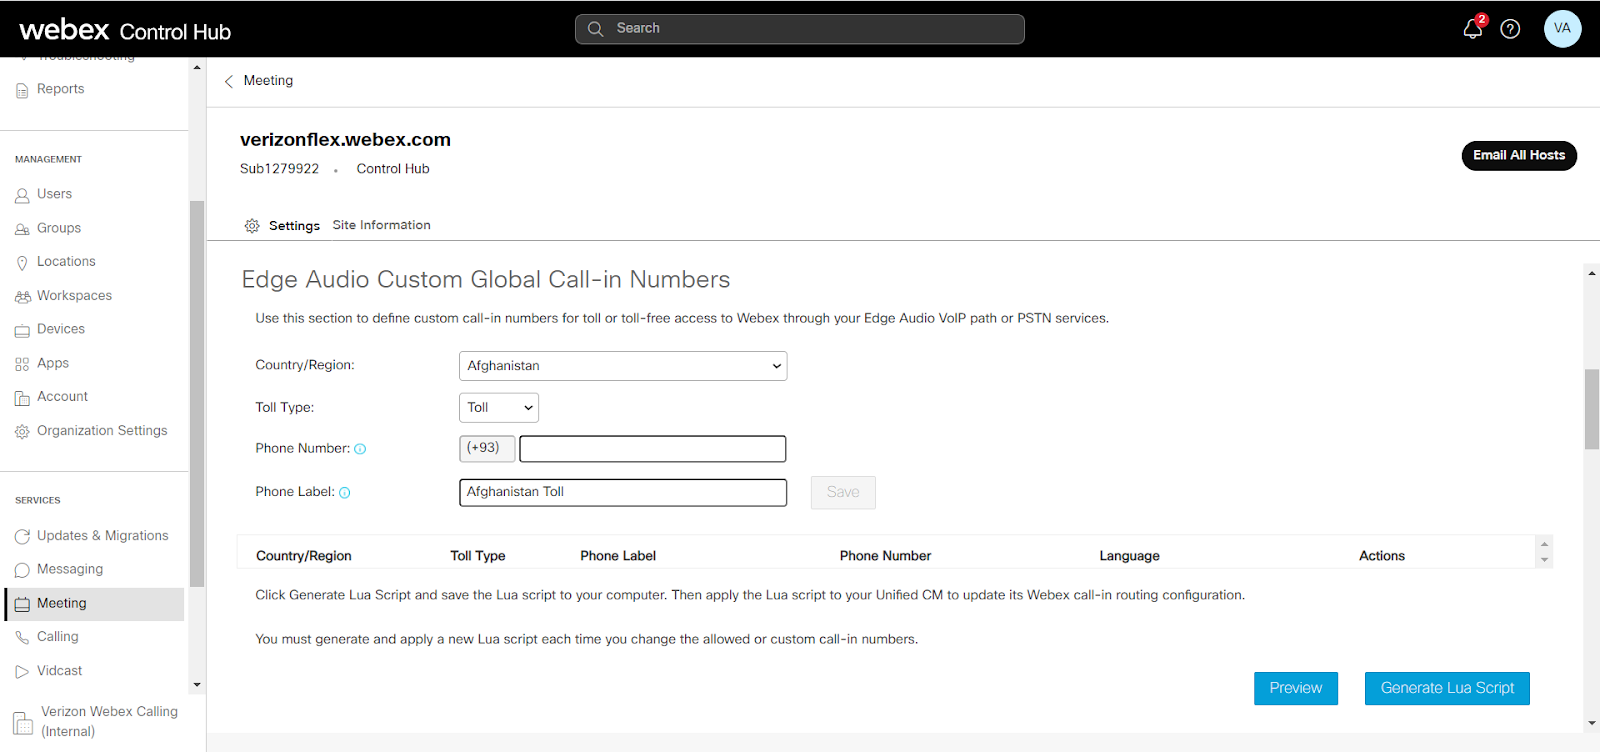
You must generate and apply a new Lua script when you change the allowed or custom call-in numbers.
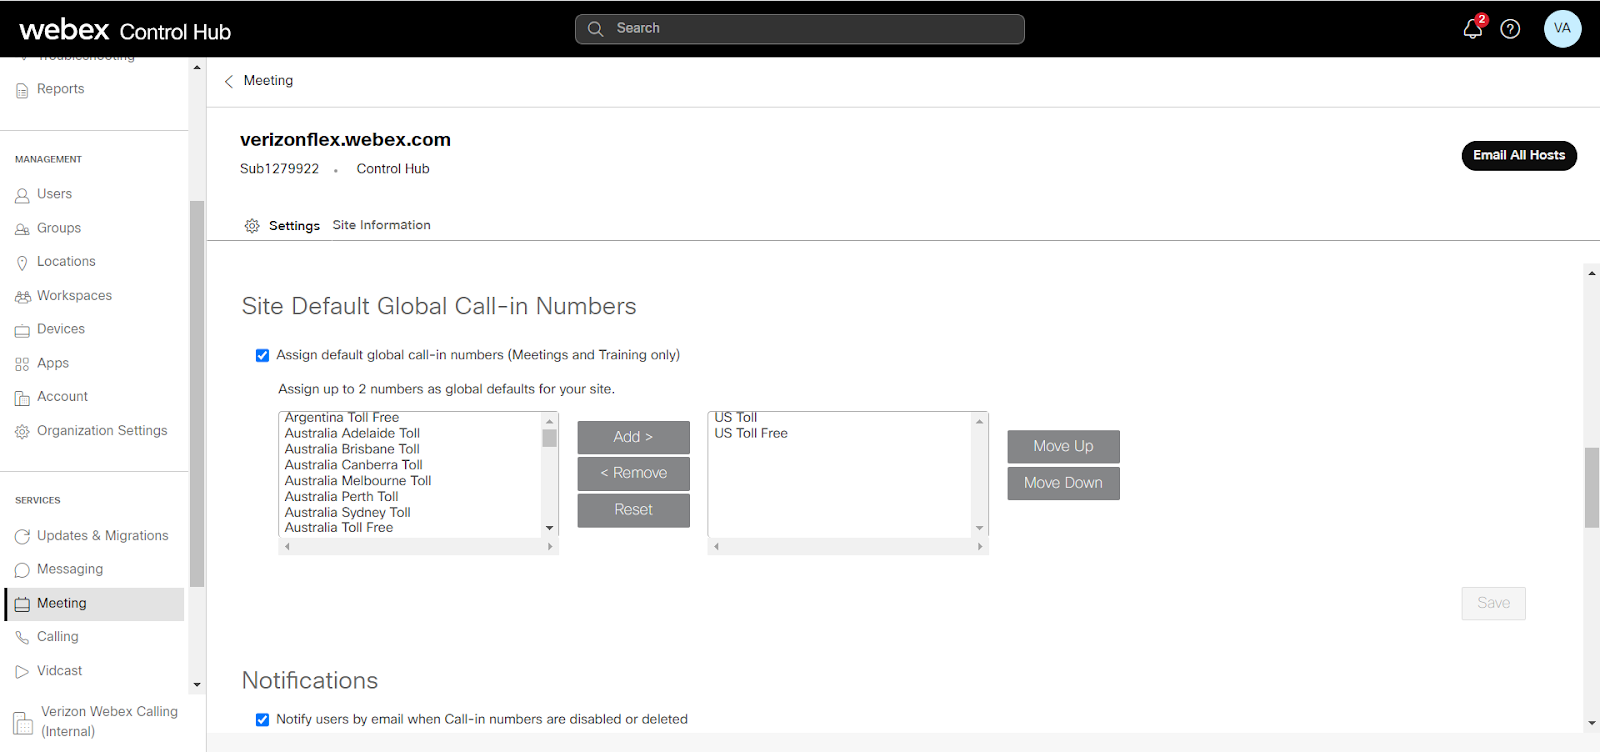
Add the Dial-in Numbers
Navigate to Site Default Global Call-in Numbers and add up to two numbers as default call-in numbers for your site.
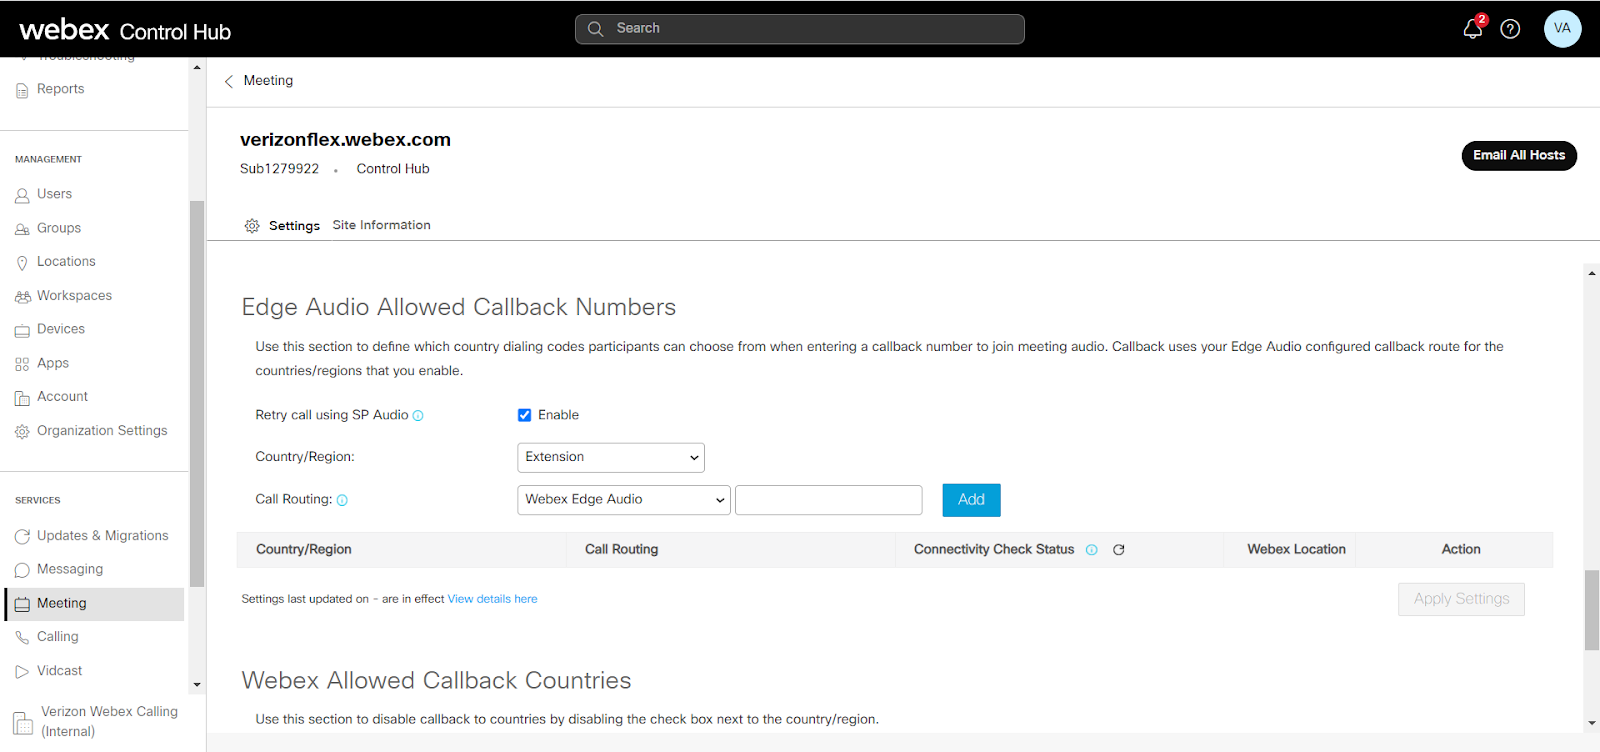
Configure DNS SRV Records
- Navigate to Edge Audio Allowed Callback Numbers and configure Expressway DNS SRV to call back to an extension of a particular customer.
- Enter the Expressway DNS SRV value wea.<customer>.<region>.wxc-di.webex.com (e.g., wea.acme.amer.wxc-di.webex.com) and click Add.
- Retry call using PSTN Audio is enabled by default.
Ensure that Webex Meeting licenses for all the users in Control Hub are enabled for both Dedicated Instance and Webex Calling.
Unified CM configuration for Integrated Audio
- Copy the LUA script information to the SIP normalization script in Unified CM.
- Navigate to Device > Device Settings > SIP Normalization Script, copy and paste the Lua script information that was generated in Step 1 and click Save.
- Map the SIP normalization script to WEA Trunk.
- Go to Device > Device Settings > Trunk, select the SIP normalization script from the Normalization Script drop-down list and click Save.
- Create a Route Pattern(s) in Unified CM to Webex Meeting toll-free number(s) and point it to the WEA-Route List.
Configure E911 for Dedicated Instance
Hybrid workers that use Cisco call control, including Dedicated Instance (DI), can integrate with a National Emergency Calling Service Provider and allow an administrator to simplify the on-premises location tracking and off-premises user location updates.
Configuring Emergency Responder with a National E911 Service Provider
Cisco Emergency Responder integrates with National E911 Service Providers like RedSky for automated Location updates and MSAG (Master Street Address Guide) for a User input location and Call Completion. Emergency Responder automatically finds and tracks the dispatchable locations of all your devices as they move throughout the enterprise so you can comply with E911 regulations.
For more information, see Configuring Emergency Responder with a National E911 Service Provider.
Configuring Unified Communications Manager for Nomadic E911 Support
Nomadic E911 enables administrators to address the requirements of RAY BAUM’S Act by letting users update their location natively in the Webex App.
For more information, see Configuring Unified Communications Manager for Nomadic E911 Support.
