
Add and edit a location for your organization
Locations make it easier to group your workforce logically, like organizing users and workspaces based on physical location.
A physical address can be used to identify a location, which can be assigned to users and workspaces. Consider creating a Headquarters location that can be identified by an address in a particular city. Workspaces can be actual rooms in that location, like the workspace in the Main conference room at the Headquarters location.
This guide reviews how to add and edit a location and how to add and assign users and workspaces to locations.
Add a location
- From Control Hub, go to Management and select Location.
- Click Manage location and select Create manually.
- Enter the following information about the location:
- Location name - Enter a unique name to identify the location.
- Country / Region - Select a country for this location. The country you select determines the address fields that follow.
- Address - Enter the location's street address. If the system recognizes the street address you've entered, a list of suggested addresses is shown. Select one of the addresses from the list to display a map. You can then move the pin to select a spot on the map. When you move the pin, it updates the location information.
Note: The map only displays if you select an address from the list; if the system doesn’t recognize the address you entered, you can save this location, but the map won't display it. - City / Town - Enter a city for this location.
- State / Province / Region - Select a state, province, or region from the drop-down list.
- ZIP / Postal Code - Enter the ZIP or postal code.
- Timezone - Select the time zone for the location.
- Email language - Select the language for email communication with new users.
- Click Create.
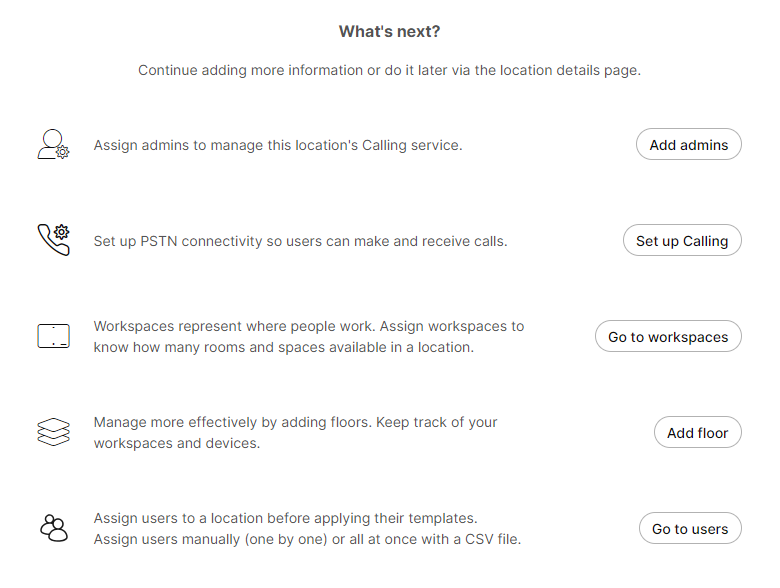
On the confirmation screen, you can use the helpful list to see what else is recommended to add or configure for your location. You can use this screen to navigate to those or do it later via the location details page.
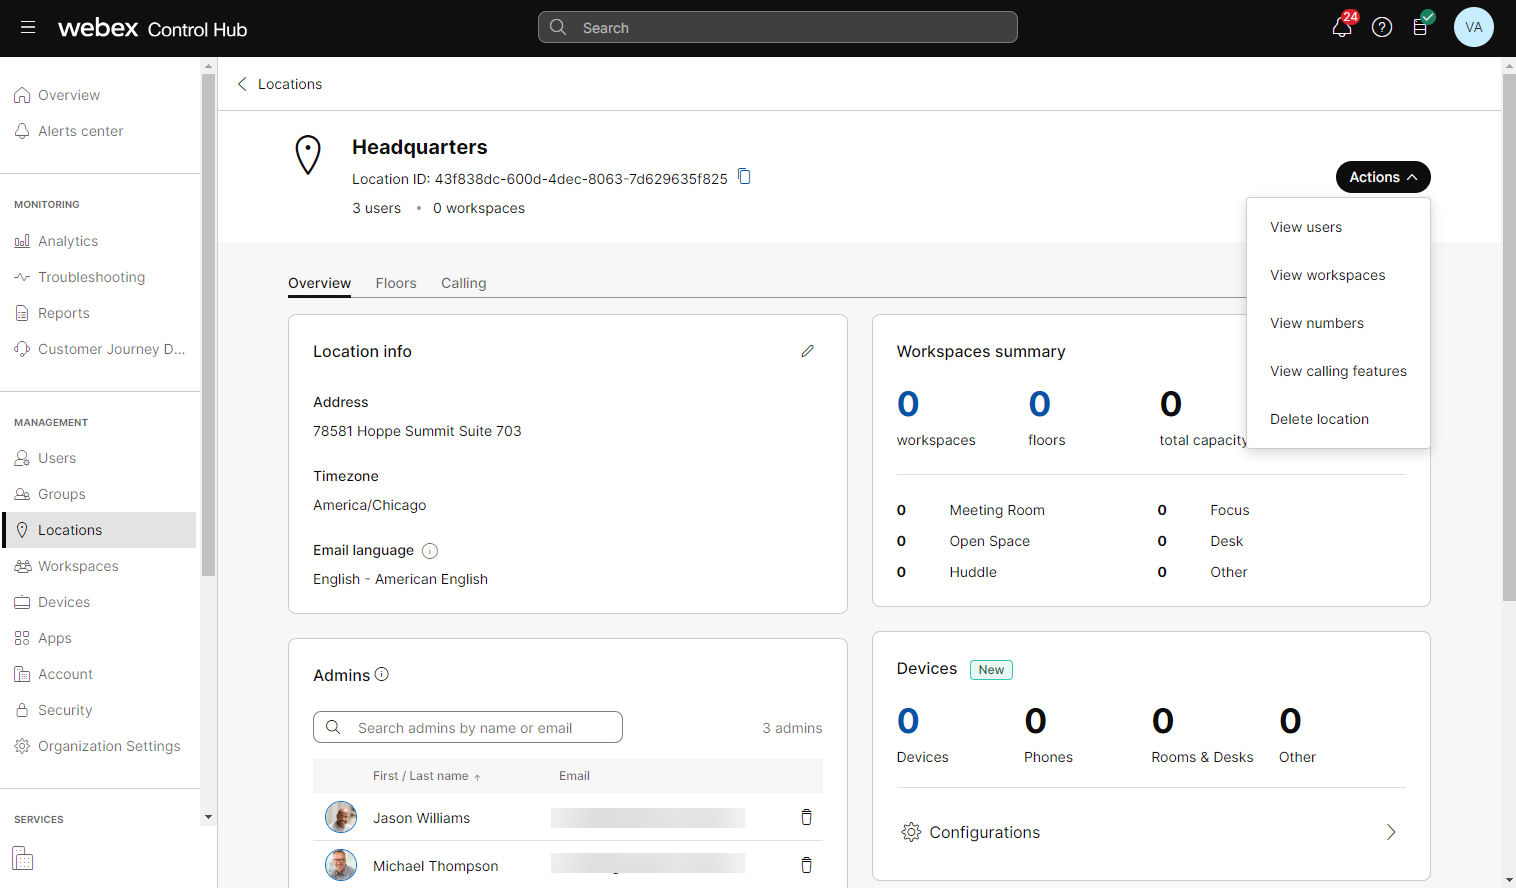
Edit a location
You can add floors, set up calling, view and edit the users and workspaces assigned to a location, and more.
A user or a workspace can only be assigned to one location.
- From Control Hub, go to Management and select Locations.
- Select the location you’d like to modify.
- Select the tab where you’d like to make your edits.
- To add floors, select the Floors tab, then click Add floor. Enter the required floor number and optional name, then click Add.
- To add Calling at this location, select the Calling tab, then click Set up calling.
- To edit existing information on any tabs, find the pane to edit and click the Edit icon to make changes.
- Click the Actions drop-down menu and select any of the following options:
- View users
- View workspaces
- View numbers
- View calling features
- Delete location
Add users to locations manually or with a CSV file
- From Control Hub, go to Management and select Locations.
- Select the location where you’d like to add users.
- Select Actions and then View users.
- Click Manage users, then click either Manually add users to add up to 25 users, or CSV add or edit to add users in bulk.
- Add the user's first name, last name, and email address, then click +.
- You can also add users by entering their email addresses separated by commas.
- When you're done adding users, click Next.
- Assign a Messaging, Meeting, or Calling license to the users, then click Next.
- Click Add users.
- Click Finish.
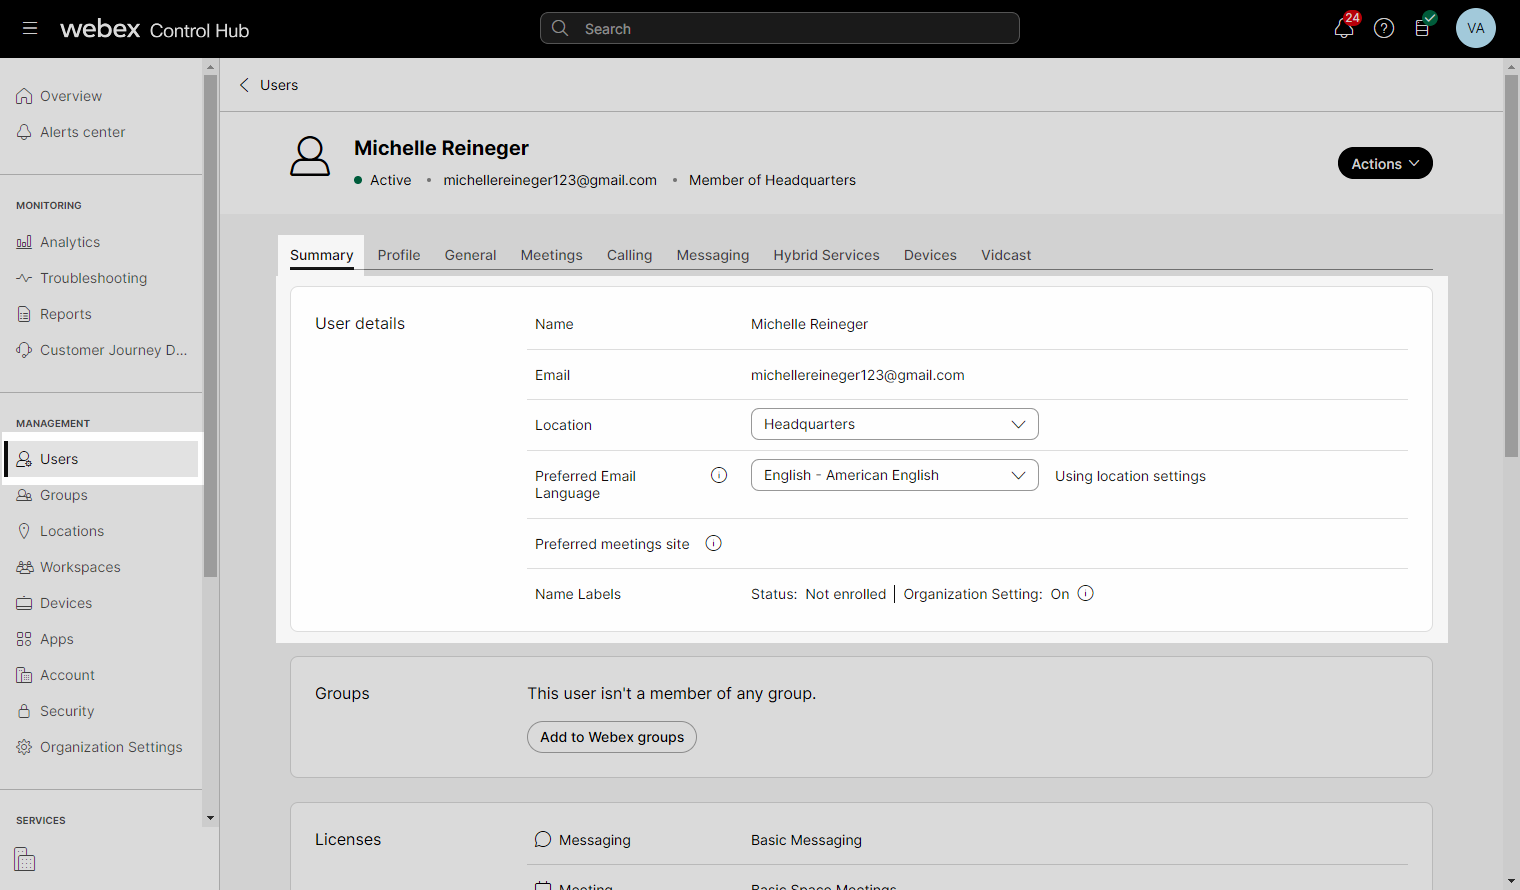
Assign a user to a location
- From Control Hub, go to Management and select Users.
- Find and select the user you’d like to assign a location to.
- In the Summary tab, under User details > Locations, select the location from the drop-down list, then click Save.
Assign a workspace to a location
- From Control Hub, go to Management and select Workspaces.
- Find and select the workspace you’d like to assign a location to.
- On the Overview tab, in the Locations pane, select Add location details.
- Choose the Location from the drop-down menu.
- (Optional) Choose a Floor, if applicable.
- (Optional) Add an Indoor navigation URL, if applicable.
- Select Save to save your changes.

