Enable fax messaging for a user
Administrators can configure fax messaging for users within Control Hub. Fax messaging allows a user to receive direct inbound faxes from their voicemail service. Fax notifications can be sent to a user’s cell phone via text or email. With this functionality, users have real-time access to fax messages, just as if they were in the office.
Feature prerequisites
The following lists important items to review before implementing the fax messaging service:
- Faxes and voicemail messages are located in a shared storage area, which holds a capacity of approximately 35Mb. This equates to about 100 minutes for voicemail or about 1000 pages of fax messages. To ensure available storage space for incoming faxes, users should be diligent about archiving important voicemails and faxes to their network storage areas.
- The time allotted for fax messages to be stored in your mailbox is unlimited.
- SuperG3 fax machines (high-speed fax or 33.6Kbps fax), must be configured to transmit and receive at 14.4Kbps. In cases where a SuperG3 fax machine communicates with a non-SuperG3 machine, fax calls may complete properly because the lower speed fax machine causes the SuperG3 to throttle down to a lower speed. If the machine speed cannot be configured, it may not function properly on Webex Calling.
The fax messaging service provided through Webex Calling, and reviewed in this guide, is separate from the settings for a stand-alone fax machine, which requires an analog telephone adapter (ATA) to convert the fax signals from standard telephone signals to VoIP. For information on Cisco ATA devices and installation, review Getting started with your Cisco ATA 191 and 192 and Improve fax transmission with your ATA.
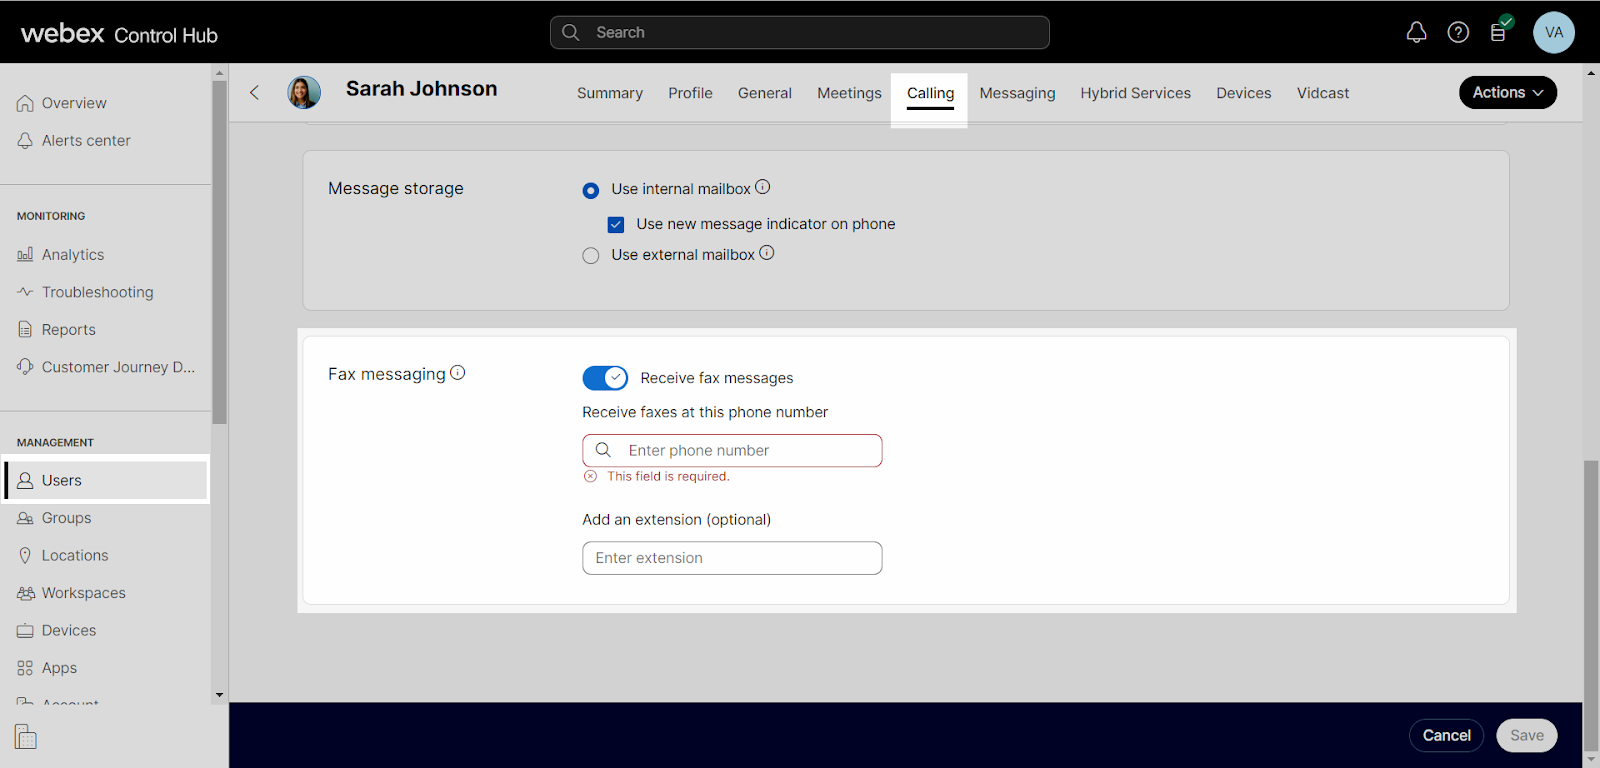
Enable fax messaging
- From Control Hub, go to the Users tab.
- Select the user you’d like to modify.
- Select Calling.
- Scroll down to Voicemail, fax, announcement language and timezone and select Voicemail.
- Under Fax messaging, select the toggle to enable.
- Enter the number you want to receive inbound faxes for the user.
- Assign an extension for the fax number, if applicable.
- Select Save to save your changes.
End users can view messages in the User Hub. For more information about viewing voicemail and fax messages, read this guide.