
Call Recording Entitlement for Users
Introduction
The Call Recording feature provides a hosted mechanism for Webex Calling customers to record the calls placed and received on the Webex Calling platform for replay and archival. This feature is helpful for quality assurance, security, training, and more.
The Call Recording service is a hybrid feature, where the Webex Calling platform enables the Call Recording user feature settings, while storage and management of recorded calls are delivered via the Dubber portal. All Webex Calling customers have access to the Dubber Go - free subscription. With Dubber Go, users get convenient call recording. Paid subscriptions are available, offering more options like compliance call recording, unlimited retention, AI analysis, and administrator access. You will need to order these.
- Dubber Go - Available to all users and gives access to unlimited recordings. Each recording is stored for 30 days. Only users can access and manage their recordings from their Dubber portal. Your administrator will need to enable call recording for you. Once enabled, you will receive an email notification from Dubber with the Dubber access details.
- Standard and AI licenses - Require a contractual agreement with Verizon. With the paid licenses, you have access to unlimited recordings, unlimited storage, and recordings can be accessed by the administrator. These include:
- Dubber Recording
- Dubber Unified Capture
- Dubber Insights
To learn more about these paid subscriptions, see the Call Recording section on the Dubber – Self Help Video Library.
Only calls made to and received on desk phones, analog telephone adaptors, or the Webex Calling app are recorded. Calls to and from the Webex app are not recorded using Dubber.
Feature Prerequisites
- Once enabled by your service provider, administrators can entitle the end users with the Call Recording feature.
- Users must have Enterprise or Basic Webex Calling user licenses assigned.
- It is recommended to consult your legal department regarding regulatory requirements about recording calls.
Call Recording Entitlement for Users
Customer administrators can entitle end users with the Call Recording feature. To do so, follow these steps:
- Log in to Control Hub at the following URL: https://admin.webex.com/login
- From the Control Hub overview page, select the Users page in the left-hand navigation. Here you will find a list of your users.
- Find and select the user you would like to entitle with the Call Recording feature.
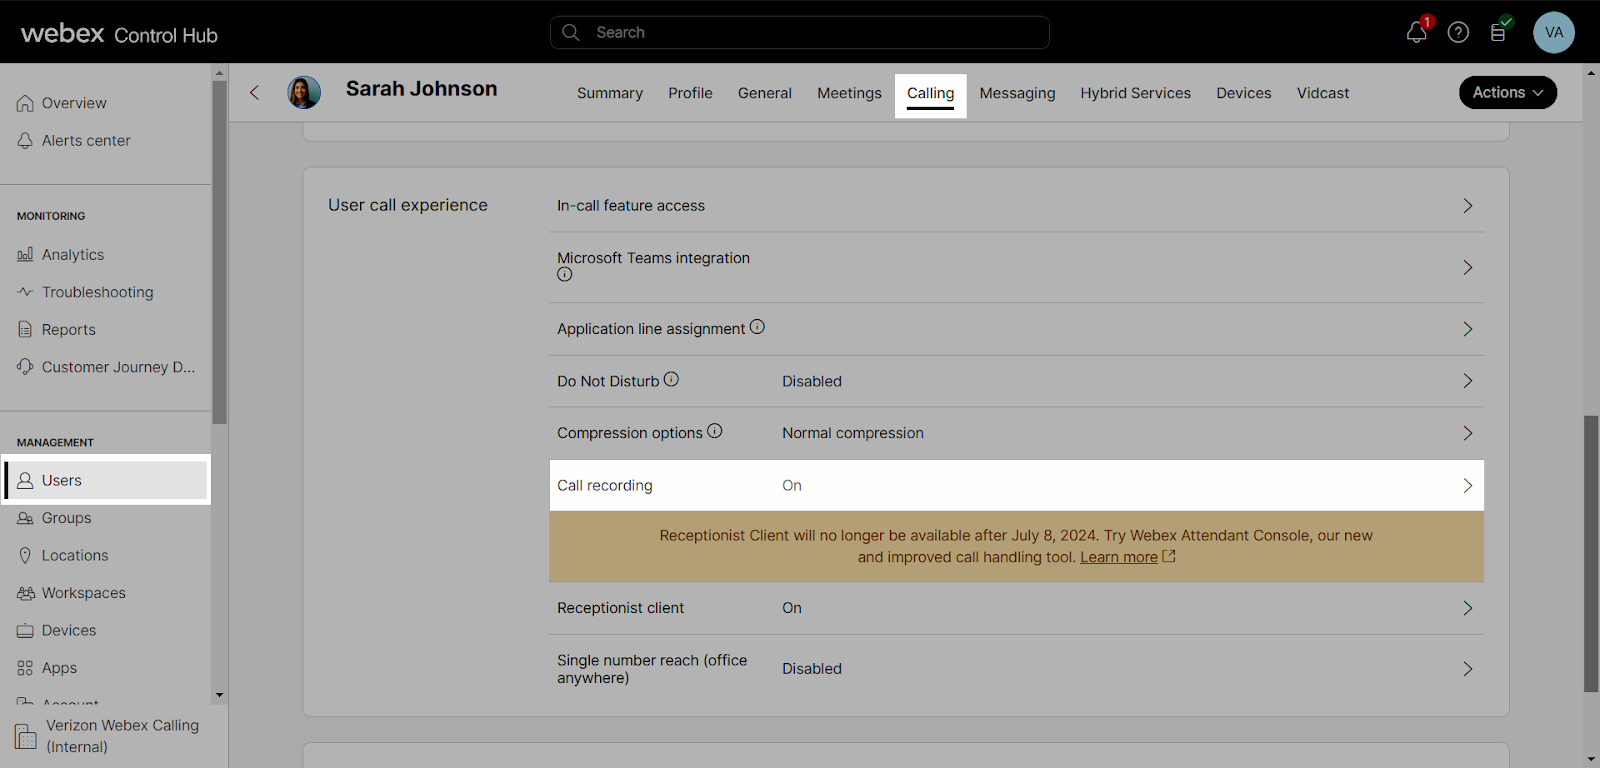
- From the user detail menu, select Calling and then scroll down to User call experience.
- Then select Call recording.

- Check the boxes next to these options to enable the following features:
- Record voice messaging - This option records voice messages sent and received. If storage space is a concern, it is recommended to not select this option.
- Play recording start/stop announcement for PSTN calls & Play recording start/stop announcement for internal calls - Manage playing of audible announcements when recording starts or stops. You can control audible announcements for internal calls and PSTN calls. With this option, a standard announcement plays at the beginning of all incoming and outgoing calls, notifying all parties that the call is being recorded. Note: Call recording is governed by both Federal and State laws. Consult with legal counsel for your State’s requirements on playing announcements.
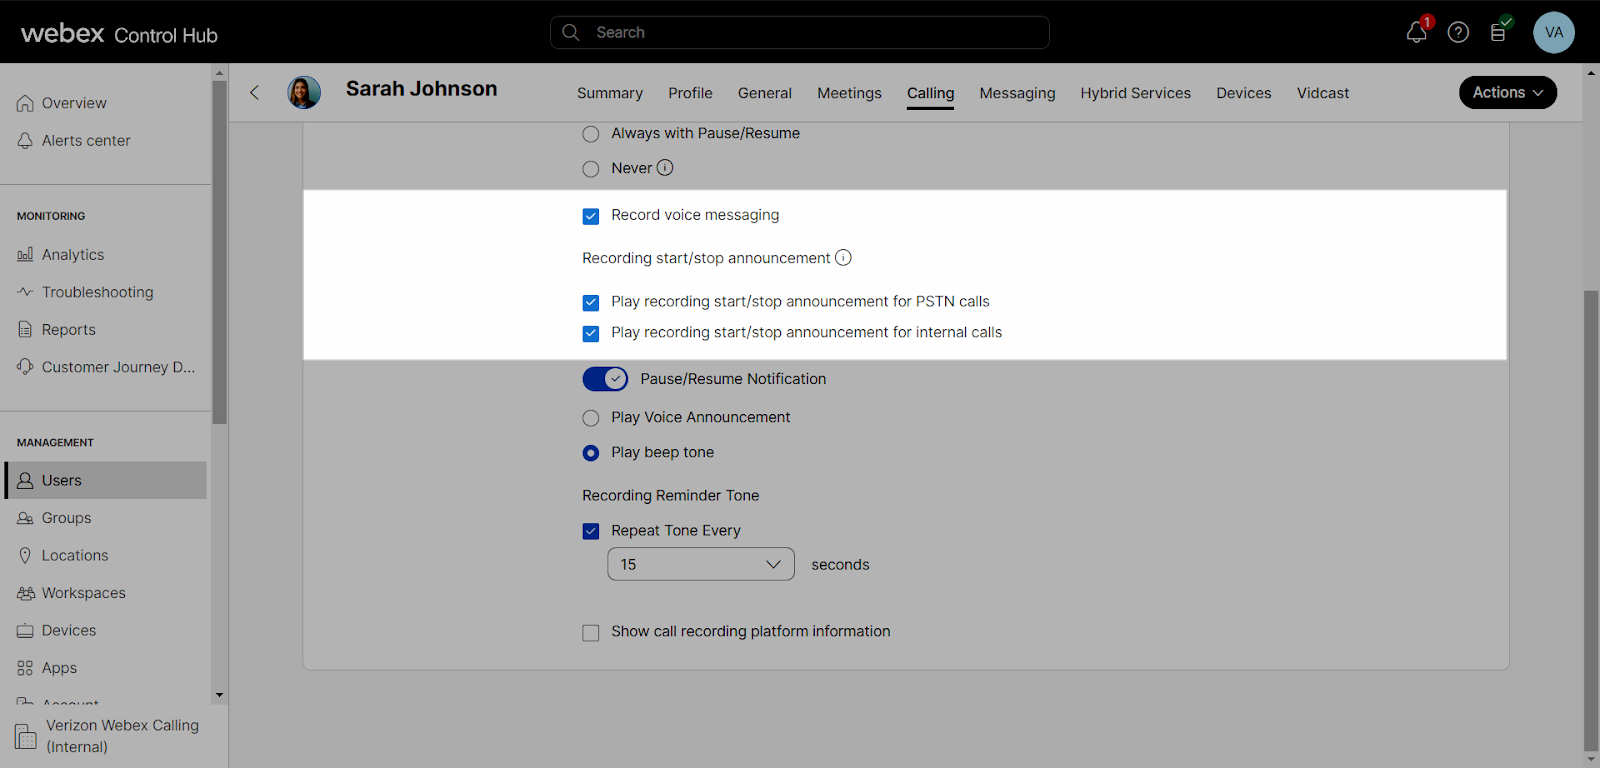
- Select the toggle next to Pause/Resume Notification to play either an announcement or a beep tone when the recording is paused and/or resumed. Then choose either Play Voice Announcement or Record beep tone.
- Enable a repeat recording reminder tone under Recording Reminder Tone and select the number of seconds that the tone will repeat from the drop-down menu.
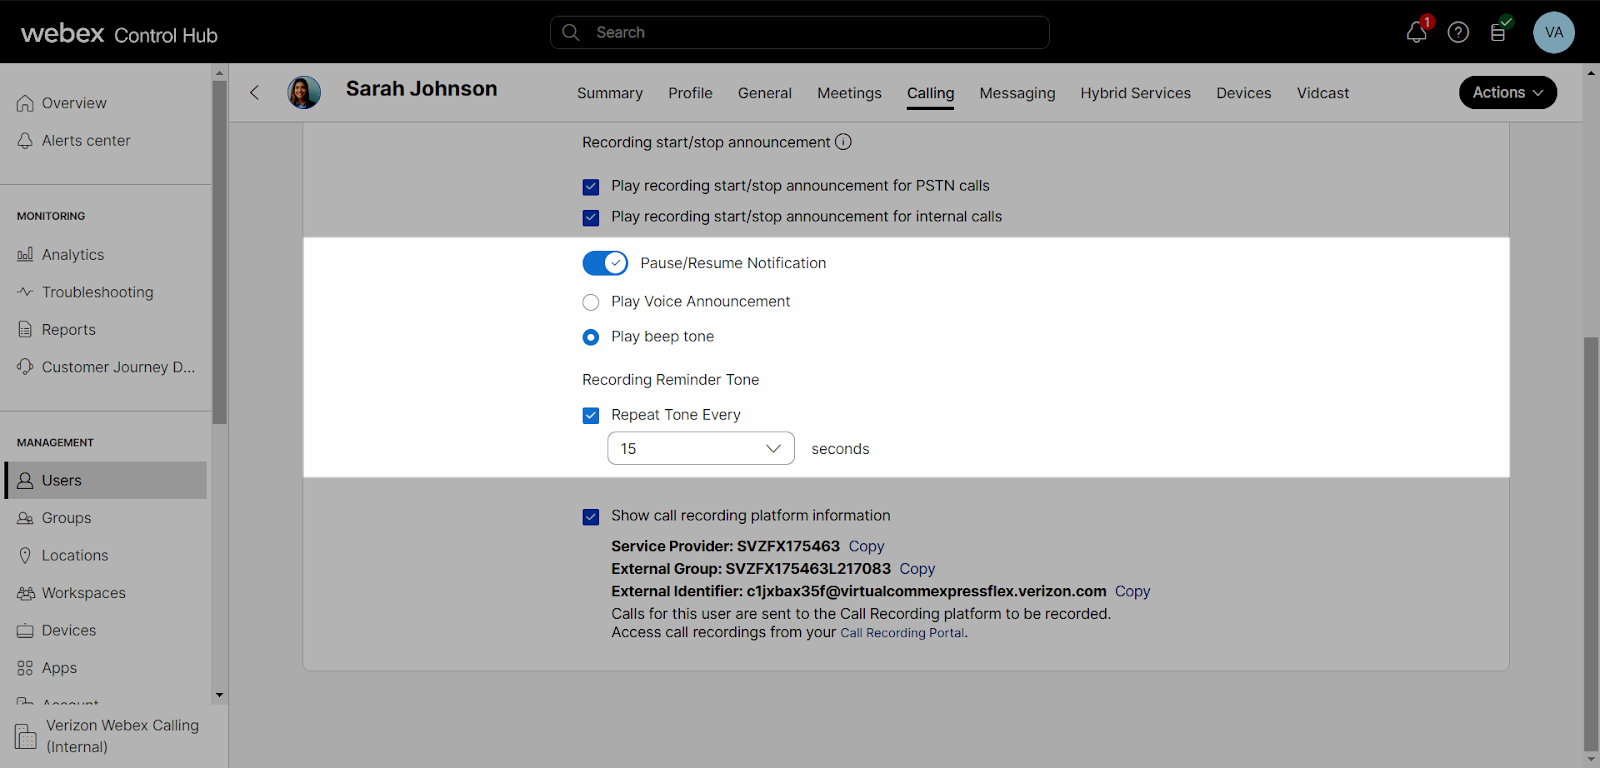
- To display the call recording platform information, check the box next to Show call recording platform information.
Note: The following IDs are used to create the user accounts in the Dubber portal. Recorded calls use the External Identifier.

Next Steps in Dubber
To provision the user in Dubber for call recording:
- Sign in to your Dubber account.
- Select the settings icon and then Account.
- Select the People tab.
- Select a user.
- Choose the appropriate External Identifier (from the user's profile within Control Hub).
- Select dub.points and click Add Dub Point.
- Make the following selections:
- Product - Choose your product.
- External Type -
- Service Provider - Copy and paste from the user's profile within Control Hub.
- External Group - Copy and paste from the user's profile within Control Hub.
- External Identifier - Copy and paste from the user's profile within Control Hub.
- Select Save to save your changes.
