
[wpseo_breadcrumb]
People work and collaborate in workspaces like huddle rooms and conference rooms. A workspace can also be a lunch room or lobby. You can set up devices and add services in these workspaces, which are assigned to the workspace and not a user.
Add a Phone to a Workspace (Cisco Device)
- From Control Hub, go to Management and select Workspaces.
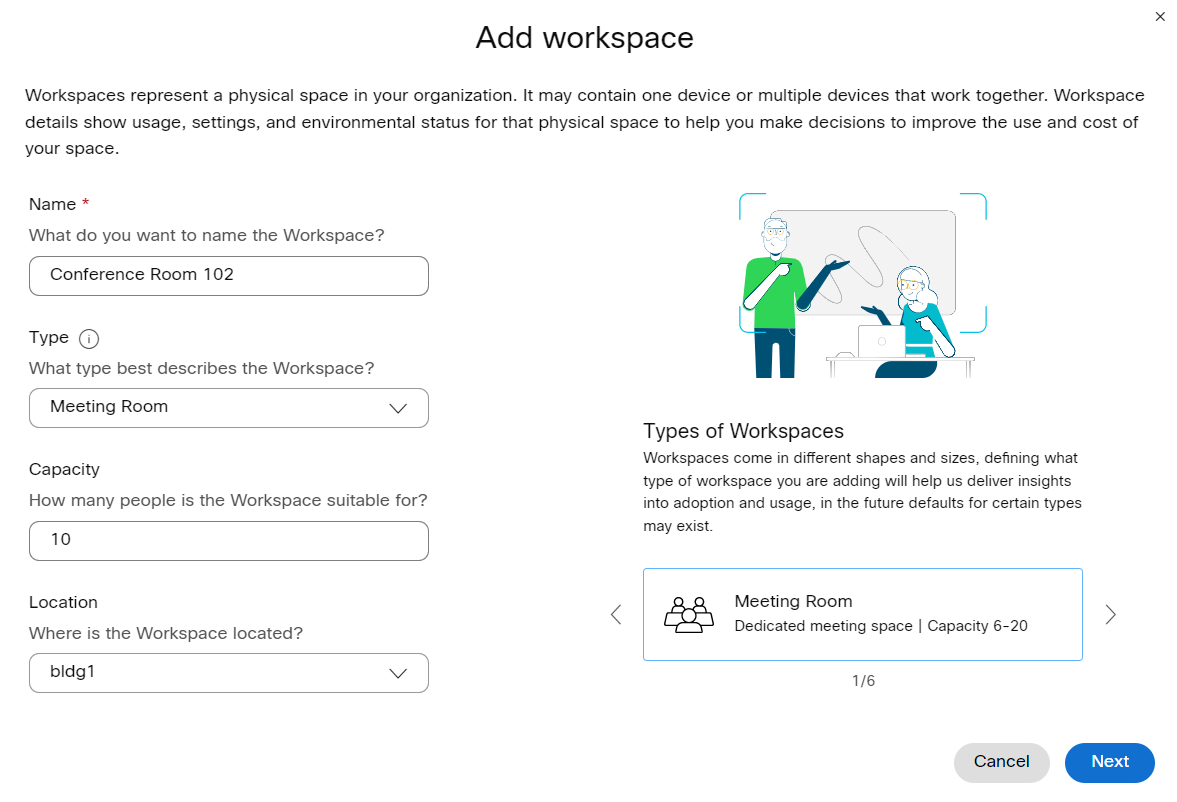
- Click Add workspace.
- Enter a name for the workspace (such as the name of the physical room), select room type and add capacity. A workspace name can't be longer than 30 characters and it can't have %, #, <, >, /, \, and " characters.
- Click Next.
- Choose Cisco IP Phone.
- Select the device type from the drop-down list, choose whether you want to register the phone with an activation code (if the option appears) or a MAC address, and then click Next.
Notes:
- If you choose to register the device using an activation code, the code is emailed to the designated administrator for the location.
- For Cisco IP Conference Phone 7832, some softkeys may not be available. If you need a full set of softkeys, we recommend that you assign this phone to a user instead.
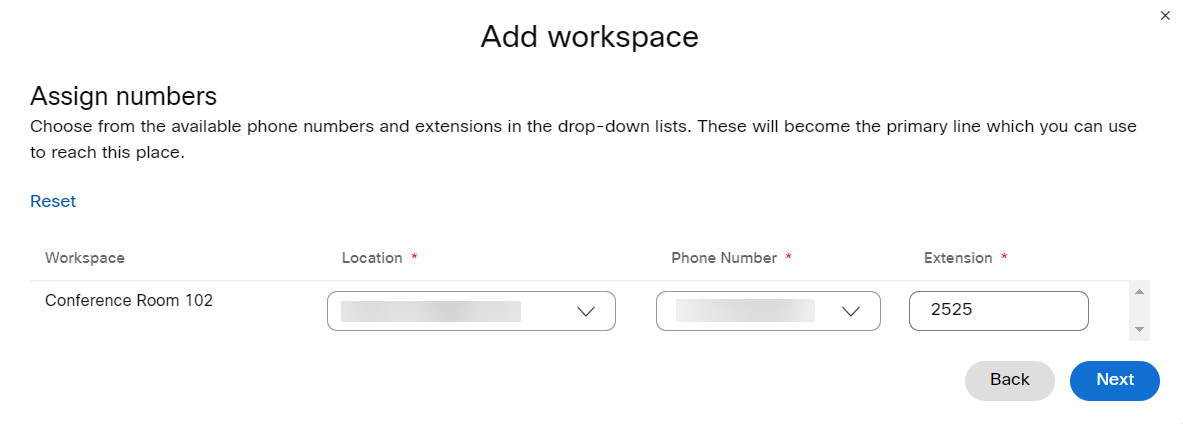
- Assign a Location and Phone Number (determined by the location that you choose). If applicable, enter an Extension, and click Next.
- The activation code is generated and you can choose to Copy, Email, or Print it. Then you can Go to Workspace or Close the window.


Add a Phone to a Workspace (Third-Party Device)
- From Control Hub, go to Management and select Workspaces.
- Click Add workspace.
- Enter a name for the workspace (such as the name of the physical room), select room type and add capacity. A workspace name can't be longer than 30 characters and it can't have %, #, <, >, /, \, and " characters.
- Click Next.
- Select Cisco IP Phone.
- From the Select Device drop-down list, select the device you’d like to add. If it is not listed, select Customer Managed Device.
- Choose the Device Vendor from the drop-down list and enter the MAC address.
Note: If you've selected a fax service, then the MAC address field is automatically populated with a fake MAC address and it's read-only. - Read the disclaimer and click the confirmation box.
- Click Next.
- Assign a Number to your device.
- Click Save.
- The confirmation screen shows important information that you need to finish the provisioning process of your Customer-Managed Device.
Note: Note your SIP Username and Password as you need this information to finish setting up your customer-managed device. You can also download this information in a CSV file for your records. This is the last time that you can see the password in full.


Add Services for a Webex Room Device or Cisco Webex Board
- From Control Hub, go to Management and select Workspaces.
- Click Add Workspace.
- Enter a name for the workspace (such as the name of the physical room), select room type and add capacity. A workspace name can't be longer than 30 characters and it can't have %, #, <, >, /, \, and " characters.
- Click Next.
- Choose Cisco Webex device, and then click Next.
Note: You can only have one type of device in a single space. For example, you can add multiple Webex Room Devices or a Webex Board, but not a combination of the two. The exception is Companion Mode, where you can have one Webex Board and one Room Series device in a Workspace. - Choose a call service to assign to devices in the workspace and click Next:
- Call on Webex (1:1 call, non-PSTN) (default)—For Webex App app and SIP address calling.
- Cisco Webex Calling—Add PSTN service to the device in the Workspace through the Webex Calling service—depending on your deployment, the PSTN service may come from a local gateway on the premises, through the PSTN the Service Provider bundled, or through a cloud connected PSTN (CCP) provider. Assign a phone number and extension to the device, and then click Next.
For more information about the PSTN options, see PSTN Connectivity in the data sheet.
- (Optional) Toggle on the calendar service so that people can use One Button to Push (OBTP) on this device and click Next. Then select calendar service from the drop-down menu and add Email Address and select Resource Group.
Enter or paste the email address of the room device. This is the email address that will be used to schedule meetings:
- For devices that will be scheduled in Google Calendar, enter the Google resource email address from G Suites (Calendar > Resources). See About calendar resources (rooms, etc) for more information.
- For devices that will be scheduled in Microsoft Exchange or Office 365, enter the email address of the room mailbox. See Create and Manage Room Mailboxes for more information.
This option requires the Hybrid Calendar. To configure the service, see the Deployment Guide for Cisco Webex Hybrid Calendar Service.
- Click Next, and then activate the device with the code provided.


Add Services for Webex Share
Before you can use your Webex Share, you associate the device to a physical location.
- From Control Hub, go to Management and select Workspaces.
- Click Add Workspace.
- Enter a name for the workspace (such as the name of the physical room), select room type and add capacity. A workspace name can't be longer than 30 characters and it can't have %, #, <, >, /, \, and " characters.
- Click Next.
- Choose Cisco Webex device, and click Next.
Note: You can only have one type of device in a single space. For example, you can add up to 10 desk phones to a lobby or a single Webex Room Device, but not a combination of the two. - Choose Call on Webex (1:1 call, non-PSTN) (default). Although a call service doesn't apply to Webex Share, select the default to move to the next step.
- (Optional) Toggle on the calendar service so that people can use One Button to Push (OBTP) on this device and click Next. Then select calendar service from the drop-down menu and add Email Address and select Resource Group.
Enter or paste the email address of the room device. This is the email address that will be used to schedule meetings:
- For devices that will be scheduled in Google Calendar, enter the Google resource email address from G Suites (Calendar > Resources). See About calendar resources (rooms, etc) for more information.
- For devices that will be scheduled in Microsoft Exchange or Office 365, enter the email address of the room mailbox. See Create and Manage Room Mailboxes for more information.
This option requires the Hybrid Calendar. To configure the service, see the Deployment Guide for Cisco Webex Hybrid Calendar Service.
- Click Next, and generate your Activation code.
Note: If you use certificates, then deploy the certificate to your Webex Share before activating it.


